The good news is that with the right approach and a strong emphasis on safety, you can often tackle this problem yourself. This guide will walk you through everything you need to know about how to fix roof ice buildup, from emergency removal to long-term prevention.
What Causes Ice Dams in the First Place?
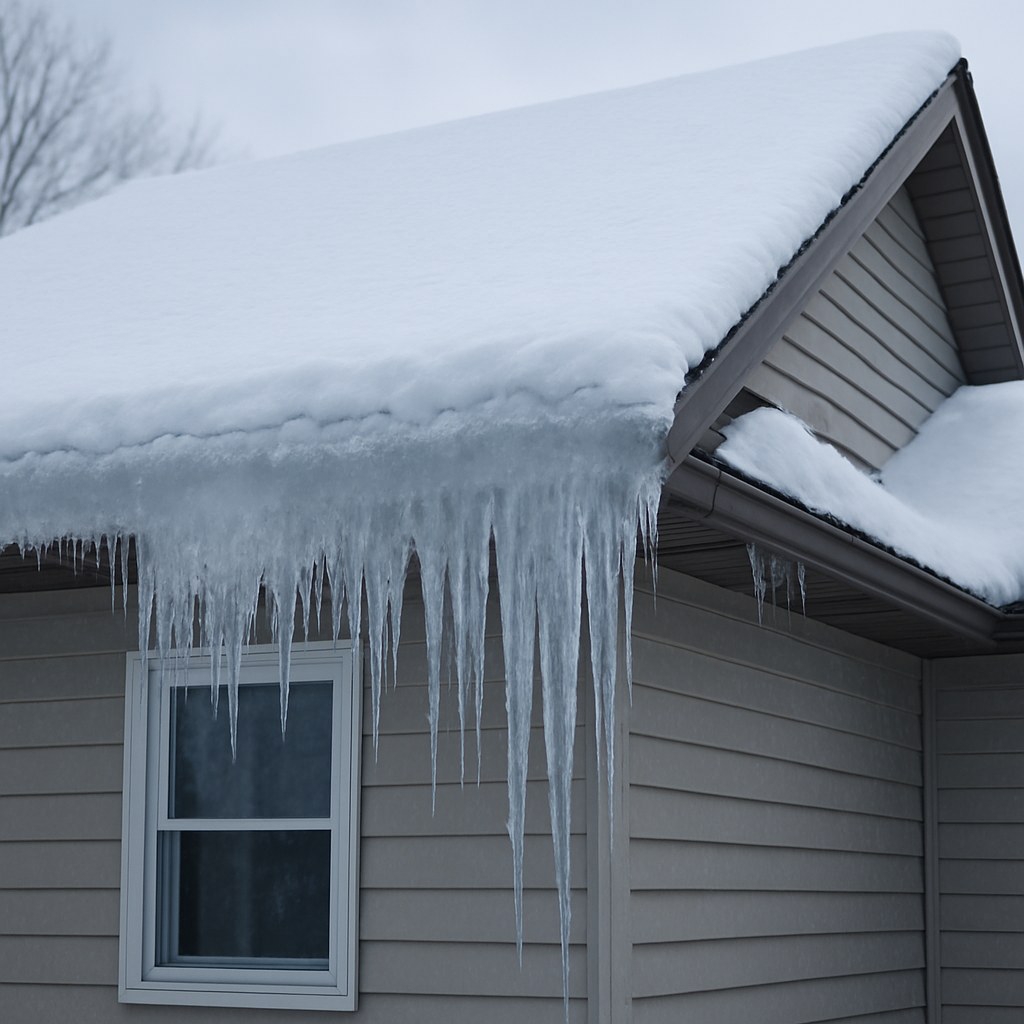
Before we jump into the fix, let's talk about why this happens. An ice dam isn't just frozen snow; it's the result of a specific temperature imbalance on your roof.
Here’s the cycle:
- Heat Escapes: Warm air from your living space rises into the attic. If your attic isn't properly insulated and ventilated, this heat warms the underside of your roof.
- Snow Melts: The snow on the upper, warmer parts of your roof melts and flows down toward the eaves.
- Water Refreezes: The eaves and gutters extend past the heated walls of your house, so they remain at or below freezing temperature. When the meltwater reaches this cold edge, it refreezes, forming a small ridge of ice.
- The Dam Grows: As this cycle continues, the ridge of ice grows larger, creating a "dam." Now, water gets trapped behind it, pooling up on your roof. This standing water can then seep under your shingles and into your home.
According to the Insurance Information Institute, water damage from freezing is one of the most common and costly causes of homeowner insurance claims. Preventing that damage starts with addressing the ice on your roof.
First Things First: A Crucial Safety Evaluation
Working on a roof in icy, winter conditions is extremely dangerous. Before you even think about grabbing a ladder, you need to assess the situation honestly.
Your safety is the number one priority. Ask yourself these questions:
- Is my roof steep or hard to walk on? If you can't stand on your roof without leaning forward significantly, it’s too steep for a safe DIY job.
- What is my roofing material? Fragile materials like slate or clay tiles can crack easily underfoot or from tools, leading to expensive repairs. It's best to leave these to the pros.
- Do I have the right equipment? You'll need a sturdy, well-placed extension ladder (not a stepladder), and you absolutely must have a helper to hold it steady.
- Am I comfortable with heights? If working on a ladder makes you nervous, this is not the project to test your limits.
If you answered "yes" to a steep roof or fragile materials, or "no" to proper equipment or comfort with heights, your next step is simple: call a professional. A roofing or ice dam removal specialist has the training, insurance, and specialized equipment (like low-pressure steamers) to do the job safely and effectively.
How to Remove Roof Ice: Your Step-by-Step Guide
If you've done your safety check and are confident you can proceed, it's time to get to work. The method you use will depend on whether you have a large, continuous ice dam or just a few scattered patches of ice.
Scenario 1: Removing a Continuous Ice Dam
This is for more severe cases where a solid ridge of ice runs along most of your eaves.
Tools You'll Need:
- Extension ladder
- Helper
- Roof rake
- Calcium chloride ice melter (avoid rock salt, which can damage roofing, gutters, and plants)
- Old nylon socks or pantyhose
- Rubber mallet
- Work gloves
- Non-slip, rubber-soled boots
- Roof safety harness (highly recommended)
Step 1: Rake Away the Snow
An ice dam needs melting snow to grow. Your first step is to cut off its supply. Position your ladder on firm, level ground with your helper holding it steady. Use a roof rake to carefully pull the snow off the first 3-4 feet of your roof, starting from the edge and working your way up. Be gentle to avoid damaging the shingles.

Step 2: Create Melting Channels
Now, you’ll use calcium chloride to melt channels through the dam, allowing trapped water to drain. Fill a long nylon sock or a leg of pantyhose with the calcium chloride pellets and tie the end off securely. You don't want the pellets spilling directly onto your roof.
Lay the filled sock vertically across the ice dam, so it's perpendicular to the gutter. Place additional socks every 3-4 feet along the dam. The calcium chloride will slowly melt its way through the ice, creating a path for water to escape.
Step 3: Wait, then Clear the Slush
This part takes patience. Wait at least an hour for the channels to melt. Once they have, you can carefully use the roof rake to pull away the slushy, softened ice.
Step 4: Loosen Remaining Chunks and Clear Gutters
For any stubborn chunks that remain, you can gently tap the bottom edge with a rubber mallet to break them loose. Once the dam is mostly gone, check your gutters. Scoop out any large ice blocks by hand (while wearing gloves). Finally, you can use a garden hose with warm water to flush the gutters and downspouts to ensure they are clear and draining properly.
Scenario 2: Removing Scattered Ice Patches
If you only have isolated ice patches instead of a full-blown dam, the process is a bit simpler.
Step 1: Clear the Snow
Just as before, use a roof rake to clear the snow from a few feet above and around each ice patch.
Step 2: Apply Ice Melter
Use the same sock method, but on a smaller scale. You can cut a sock in half and place one filled section over each ice patch, letting it cross from the roof into the gutter.
Step 3: Remove Softened Ice
Wait about an hour, then use the roof rake to gently clear away the slush. Again, never scrape aggressively at your shingles.
Step 4: Check Gutters and Downspouts
Look in the gutters directly below the cleared patches and remove any dislodged ice. Pour some warm water down the nearest downspout to confirm it's not blocked.
The Permanent Fix: How to Prevent Ice Dams for Good
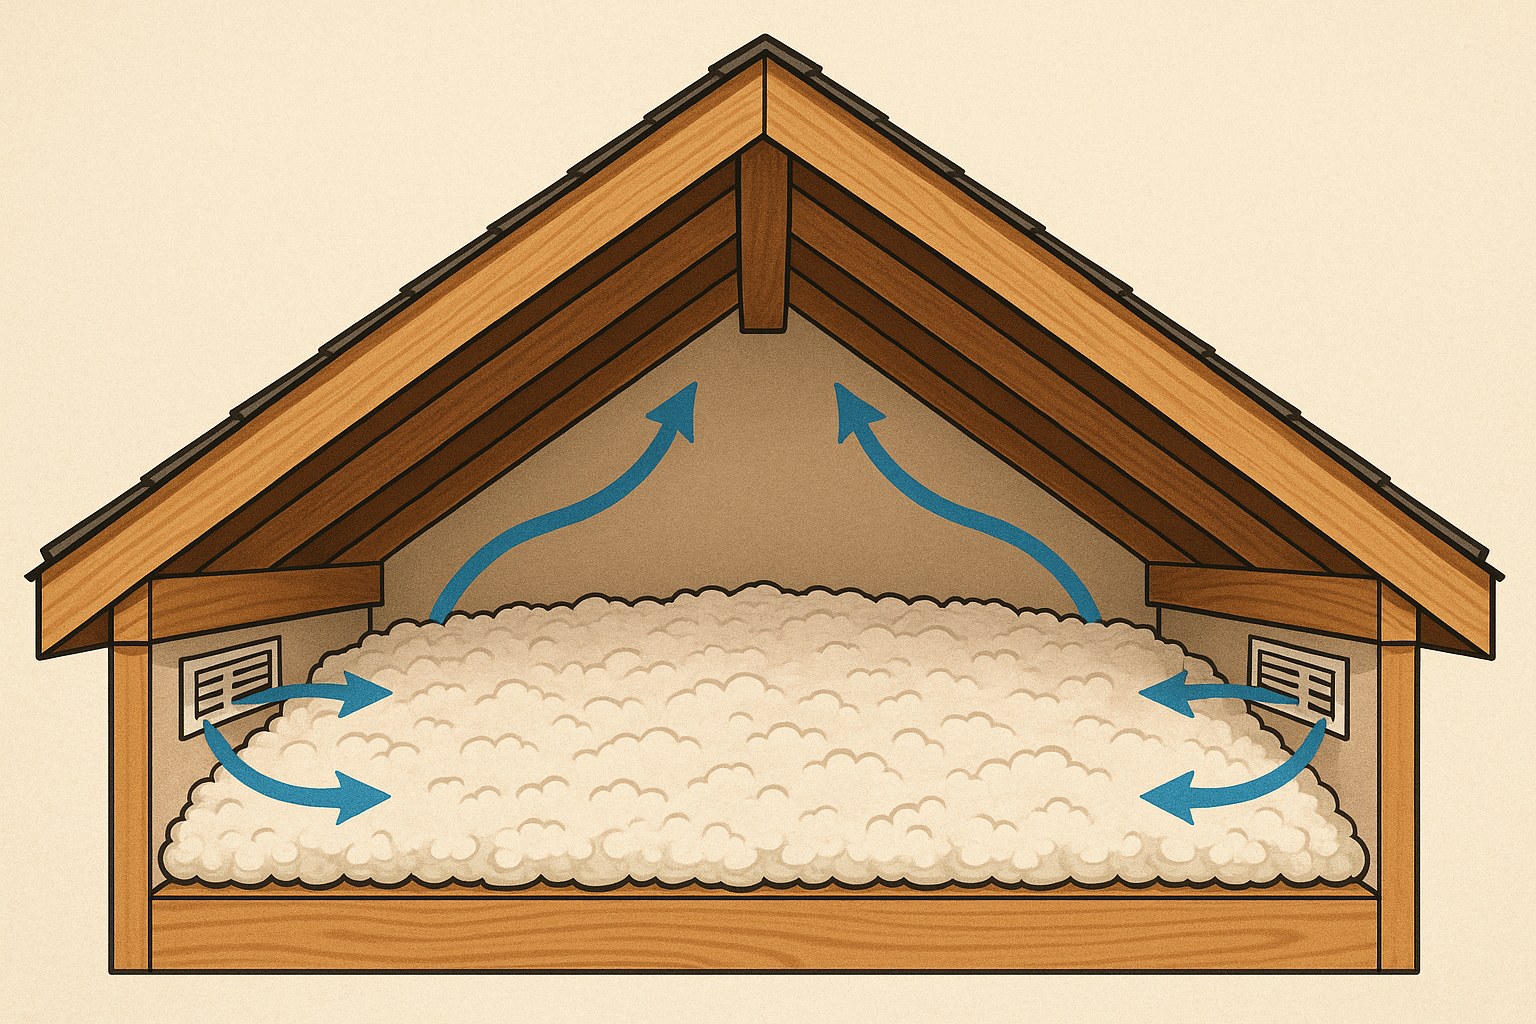
Removing an ice dam is a temporary fix. To stop them from forming every winter, you need to address the root cause: heat escaping through your attic. This means improving your attic's insulation and ventilation.
Here's a quick inspection you can do:
-
Check Insulation Depth: Safely enter your attic with a flashlight and a ruler. Measure the depth of the insulation on the attic floor. For most cold climates, the U.S. Department of Energy recommends an insulation level of R-49 to R-60, which translates to roughly 16-20 inches of fiberglass or cellulose insulation. If yours is under 10 inches, it’s likely inadequate. Also, look for any bare spots.
-
Inspect for Air Leaks: Look for gaps around light fixtures, plumbing vents, and the attic hatch. These should be sealed to prevent warm air from leaking into the attic space.
-
Check Ventilation: A well-ventilated attic has vents at the bottom (soffit vents) to draw in cold air and vents at the top (ridge or roof vents) to let warm air escape. This airflow keeps the roof deck consistently cold. Make sure your insulation isn't blocking the soffit vents and that your ridge vents are clear of debris.
If your inspection reveals thin insulation or blocked vents, it's best to contact an insulation professional. They can perform an energy audit and recommend the best course of action to properly air-seal, insulate, and ventilate your attic.
How Much Does Ice Dam Removal Cost?
Making the call between DIY and hiring a pro often comes down to cost.
- DIY Costs: If you already have a good ladder, your costs will be minimal—primarily for a roof rake ($50 - $100) and calcium chloride ice melt ($20 - $30).
- Professional Costs: Hiring a professional is an investment in safety and effectiveness. According to Angi, professional ice dam removal can cost anywhere from $500 to over $4,000, depending on the severity, size of your roof, and removal method (specialized steaming is most effective and safest for your roof). It's often billed hourly due to the hazardous nature of the work.
Don't Let Winter Win
Dealing with roof ice can be intimidating, but by putting safety first and following these steps, you can protect your home from costly water damage. Remember to clear the ice dam for the immediate threat, but focus on improving your attic insulation and ventilation for a long-term solution.
Feeling overwhelmed? You don't have to manage your home alone. For more expert advice, step-by-step DIY guides, and a direct connection to vetted, trusted professionals for the jobs you can't handle, download the Casa app today. We're here to make home maintenance simple and stress-free.


