The good news is that replacing a tub spout is one of the most approachable plumbing repairs you can tackle. It rarely requires specialized tools, and you likely won't need to cut any pipes. In fact, most homeowners can swap out an old spout for a shiny new one in less than an hour.
If you’ve been putting this off because you’re worried about breaking something behind the wall, take a deep breath. We will walk you through exactly how to identify what kind of spout you have and how to replace it safely.
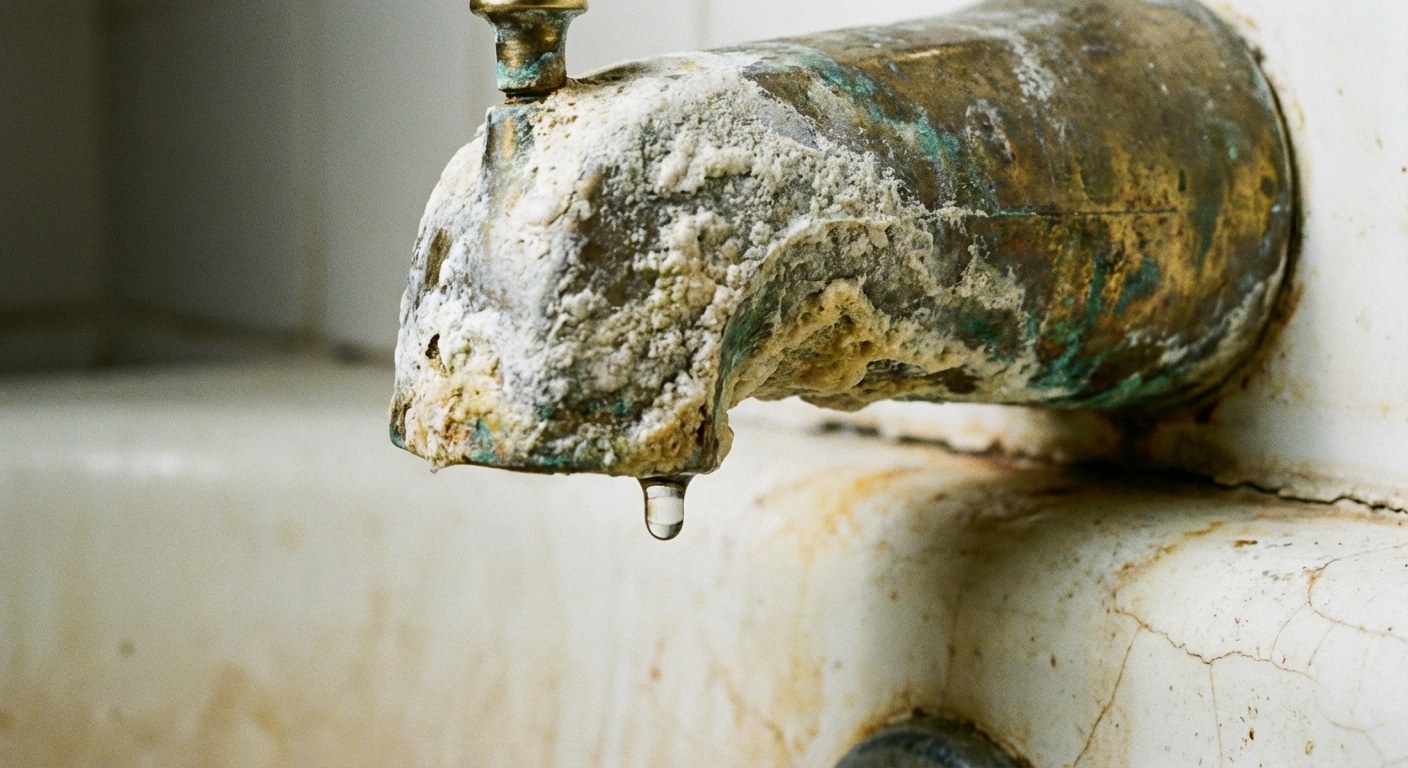
Why Is My Spout Leaking?
Before we start unscrewing things, it helps to understand why the spout failed. Usually, it comes down to a few simple factors:
- Worn Diverter Gate: The internal plastic gate that blocks water to force it up to the showerhead eventually wears out, allowing water to escape from the tub spout even when the shower is on.
- Mineral Buildup: Hard water deposits can seize the internal mechanisms or corrode the threads connecting the spout to the pipe.
- Failed Seal: The connection between the pipe and the spout can loosen over time, causing water to drip from the rear of the fixture.
Is It Safe to DIY?
For the vast majority of homes, this is a safe DIY project. However, there are clear signs when you should stop and call a professional.
Safe to try yourself if:
- The spout is visibly old, corroded, or the diverter is stuck.
- The leak is coming from the mouth of the spout or directly behind it against the tiles.
- You are comfortable using basic tools like a wrench and a hex key.
Call a professional if:
- The pipe feels loose: If the pipe coming out of the wall wiggles significantly when you touch the spout, you risk breaking a connection inside the wall.
- You see active leaks inside the wall: If water stains are appearing on the ceiling below the tub or on the wall behind it, the issue is deeper than just the spout.
- The pipe breaks: In the rare event the copper pipe snaps off while removing the spout, turn off your main water immediately and call a plumber.
Phase 1: Diagnosis and Preparation
You cannot buy a replacement spout until you know exactly how your current one is attached. There are two main types: Slip-on and Screw-on.
Step 1: Check for a Diverter
Does your spout have a knob or lever to switch between bath and shower?
- Yes: You need a "diverter spout."
- No: You need a "non-diverter spout."
Step 2: Check the Attachment Style
Look closely at the underside of the spout, right near the wall. Run your finger along the bottom if you can't see clearly.
- If you feel a small gap with a screw inside: You have a Slip-on Spout. It slides over a smooth copper pipe and is held in place by a set screw.
- If the bottom is smooth with no screw: You have a Screw-on Spout. It threads directly onto a pipe nipple coming out of the wall.
Step 3: Buy the Replacement
Once you know the type, measure the length of your current spout from the wall to the tip. Head to the hardware store and buy a matching replacement. Using a Casa project list to track these measurements ensures you don't have to make a second trip to the store.
Phase 2: Removing the Old Spout
Tools you’ll likely need:
- Hex key (Allen wrench) set
- Pipe wrench or large adjustable wrench
- Towel or rag
- Stiff brush or scouring pad
- Plumber’s tape (Teflon tape)
- Flashlight
1. Turn off the water supply
While you technically can change a spout without turning off the house water (since the faucet valves hold the water back), it is safer to turn off the main water supply valve. This prevents accidental flooding if a valve gets bumped or breaks.
2. Cover the drain
Place a thick towel over the bathtub drain. This protects the tub finish from scratches if you drop a tool and prevents small screws from falling down the drain.
3. Remove the spout
- For Slip-on Spouts: Use a hex key to loosen the set screw underneath. You don't need to take the screw all the way out; just loosen it enough to release the grip. Pull the spout straight out firmly. twisting slightly if needed.
- For Screw-on Spouts: These can be tight. Insert a heavy screwdriver into the spout opening (as a lever) or use a pipe wrench. If using a wrench, wrap the old spout in a towel to get a grip. Turn counter-clockwise to unscrew it.
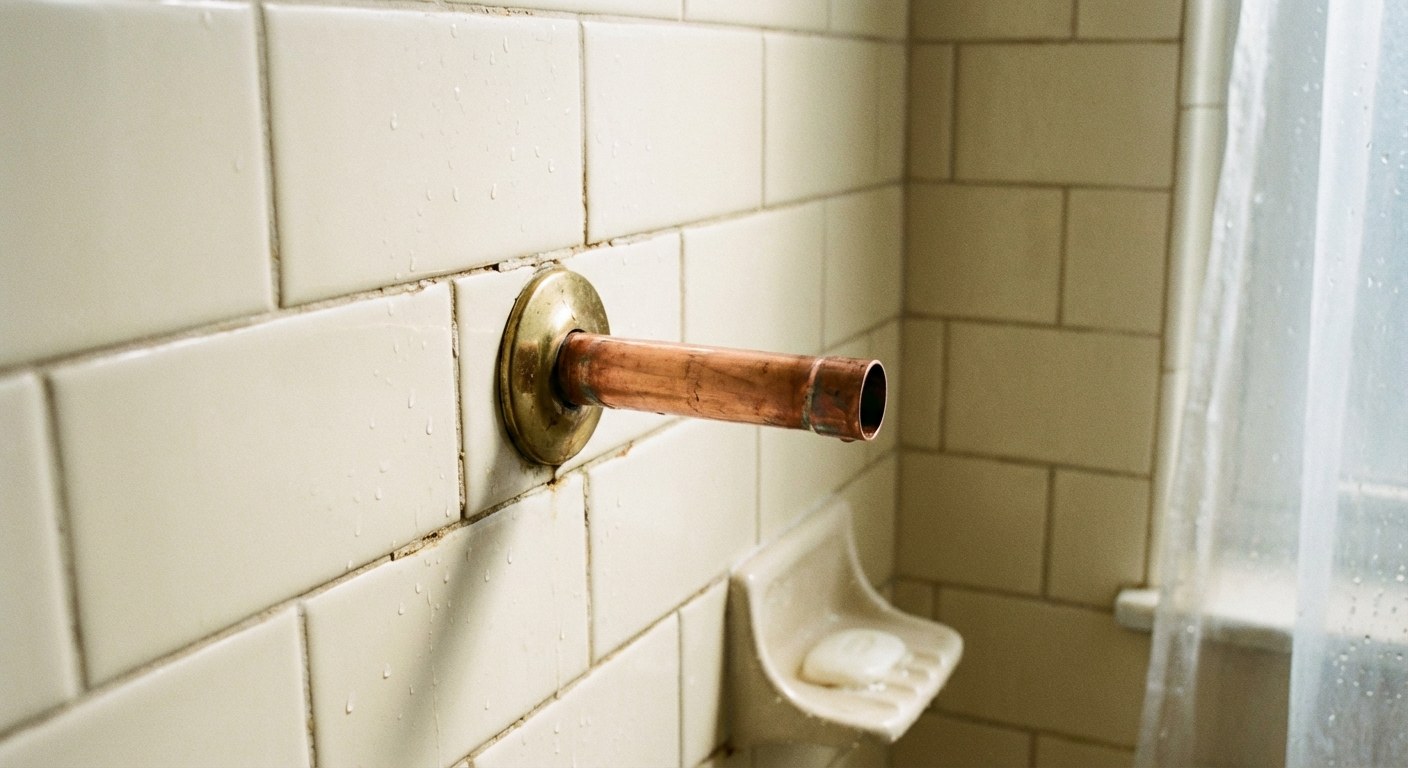
4. Inspect the pipe
Once the spout is off, look at the pipe sticking out of the wall.
- Copper Pipe (smooth): This confirms a slip-on installation.
- Threaded Pipe (nipple): This confirms a screw-on installation.
- Check for damage: Clean off any old tape, caulk, or mineral buildup. If the pipe looks cracked, bent, or heavily corroded, stop here and call a professional.
Phase 3: Installing the New Spout
Now that the pipe is clean and ready, let's get the new fixture on.
Option A: Installing a Slip-on Spout
- Prep the pipe: Although slip-on spouts rely on an O-ring, wrapping a little plumber's tape near the end of the copper pipe can help the seal slide on smoothly without tearing.
- Slide it on: Push the new spout onto the copper pipe. Push firmly until the back of the spout sits flush against the wall tiles.
- Align and tighten: Make sure the spout is perfectly straight. Locate the set screw recess underneath and tighten it with your hex key. Hand-tight is usually sufficient—overtightening can dent the copper pipe.
- Seal (Optional): Run a thin bead of silicone caulk around the top and sides where the spout meets the wall (leave the bottom open for drainage).
Option B: Installing a Screw-on Spout
- Tape the threads: Apply 3–4 layers of plumber’s tape to the threaded pipe nipple coming out of the wall. Wrap in a clockwise direction so the tape doesn't unravel when you screw the spout on.
- Thread it on: Screw the new spout onto the pipe by hand. Be careful not to cross-thread it.
- Tighten: Turn it clockwise until it is hand-tight against the wall. If it's hard to turn, place a towel over the spout and use a wrench for the final half-turn to get it upright. The spout opening should point straight down.
Phase 4: Testing
- Turn the main water supply back on.
- Turn on the tub faucet.
- Check for leaks: Look where the spout meets the wall. Water should flow clearly from the spout, not dribble from the back.
- Test the diverter (if applicable): Pull the knob. The flow should switch to the showerhead almost entirely. A tiny dribble from the tub spout is normal, but it shouldn't be a heavy stream.
Time and Cost Estimates
- Time: 30–60 minutes.
- DIY Cost: $20–$50 for the new spout and basic supplies.
- Professional Cost: $150–$300 depending on your area and if any pipe modifications are needed.
Final Thoughts
Replacing a bathtub spout is a satisfying quick win. It instantly improves the look of your bathroom and ensures you aren't wasting water with a faulty diverter.
If you found this process involved more steps than you expected, or if you want to keep track of exactly which spout model you bought for future reference, the Casa app is an excellent tool for organizing your home’s details. You can log your repairs, save part numbers, and get maintenance reminders so you never have to guess "what size was that pipe again?"
Ready to get your home running smoothly? Download the Casa app today.
Related Reading


