Whether you have a single cold burner or the entire cooktop is unresponsive, this guide will walk you through a calm, step-by-step process to figure out what’s wrong. We’ll help you identify the problem and understand what’s safe to try yourself and when it’s time to call a professional.

First: A Quick Safety Check
Before you begin any diagnosis, safety is the first priority.
- Turn all burner knobs to the “Off” position.
- Make sure the cooktop is completely cool to the touch.
- Remove any pots, pans, or liners from all the burners.
Once the stove is off and cool, you can begin to investigate the issue.
Step 1: Identify the Scope of the Problem
Our first step is to determine if the issue is with a single burner or the entire stove. This simple test will point you in the right direction.
Turn each burner to "High" one at a time for about 30 seconds. Carefully hold your hand a few inches above the surface to feel for heat. Do not touch the burner itself.
- If only one burner isn’t working, the problem is likely with that specific burner’s coil or connection. Proceed to Step 2.
- If multiple burners (or all of them) aren’t working, the issue is more likely related to the stove's power supply. Skip ahead to Step 3.
Step 2: Troubleshooting a Single Cold Burner
If you’ve narrowed the problem down to a single burner, the next step depends on what type of cooktop you have.
- Coil cooktops have raised, removable spiral burners.
- Radiant or glass cooktops have a smooth, flat ceramic surface with the heating elements underneath.
For Electric Coil Burners (Safe to Try Yourself)
A faulty coil burner is often just a matter of a loose connection. It’s a very common issue and is usually safe and easy to fix.
- Let the burner cool completely. Make sure the knob is in the "Off" position.
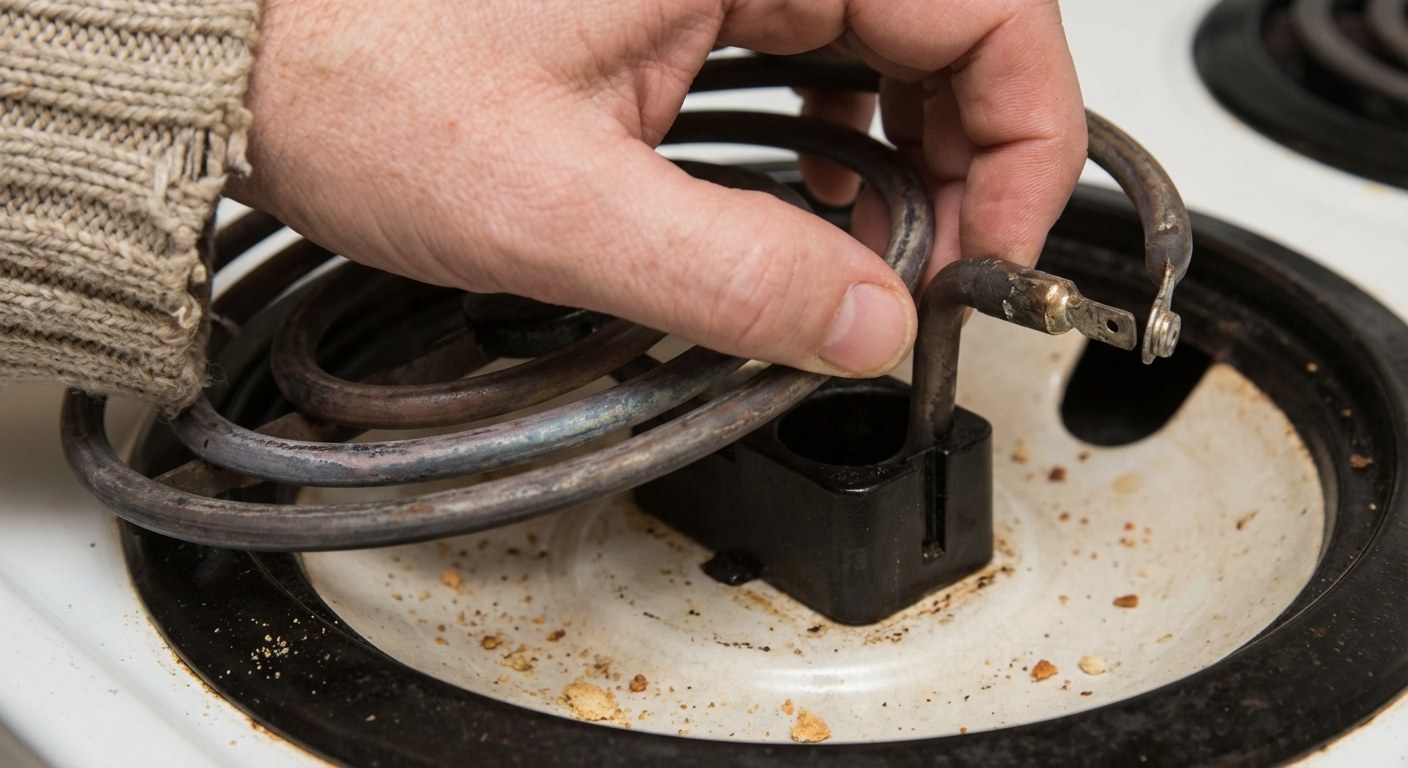
- Gently lift the coil element at the edge opposite from where it plugs in.
- Pull the coil straight out from the socket, which is called the receptacle block. The prongs should slide out smoothly.
- Inspect the coil and the connection. Look at the metal prongs on the end of the burner for any corrosion, warping, or burn marks. Also, look into the receptacle block on the stove for any melted plastic or damage.
- Reseat the burner. If everything looks clean and undamaged, simply align the prongs and push the coil firmly back into the receptacle block until it sits flat and securely.
Now, test the burner again. Turn it on to see if it heats up. If it does, your problem is solved. The connection was just loose.
If reseating the burner doesn't work:
The coil element itself may have failed. Look closely at the coil for any blisters, cracks, or breaks in the metal. If you see visible damage, the burner needs to be replaced.
Replacing a coil element is a straightforward task. You can find replacement coils at most hardware or appliance parts stores. Just be sure to get the correct model for your stove—it can be helpful to bring the old one with you or have your stove’s model number handy. Casa is a great place to keep track of your appliance models for moments just like this.
For Smooth Glass Cooktops (Time to Call a Pro)
If you have a smooth glass or ceramic cooktop, the heating elements are located beneath the surface. Repairing these, known as radiant burners, is not a safe do-it-yourself project. It requires disassembling the sealed cooktop and working with complex wiring.
You can do a quick check:
- Turn the malfunctioning burner on. Does the "Hot Surface" indicator light for that area turn on?
- Even if the surface doesn't get hot, an indicator light suggests the controls are sending power, but the element itself has failed.
In either case—whether the light comes on or not—this is where you should stop. Attempting to fix it yourself can lead to further damage or electrical hazards. It’s time to call a qualified appliance repair technician.
Step 3: Troubleshooting Multiple Cold Burners
If more than one burner—or the entire cooktop—is not heating, the problem is almost certainly electrical. The most common cause is a tripped circuit breaker.
Check Your Circuit Breaker (Safe to Try Yourself)
Your electric stove requires a lot of power and is connected to a dedicated, high-voltage circuit in your home’s electrical panel.
- Locate your electrical panel. It’s usually in a basement, garage, utility closet, or hallway.
- Find the breaker for your stove. It should be a large, "double-pole" breaker (two switches linked together) and may be labeled "Range," "Stove," or "Oven."
- Reset the breaker. Flip the breaker firmly to the full "Off" position, then back to the "On" position. Sometimes a breaker can look like it's on when it has actually tripped to a middle position.
- Test the stove. Return to the kitchen and try turning on a burner.
If the burners now heat up, you've solved the problem. If the breaker trips again right away or shortly after you turn on the stove, there is a larger electrical issue with the appliance or your home's wiring. Do not keep resetting it. This is a clear sign to call a professional.
When to Call a Professional for Power Issues
If resetting the breaker doesn't restore power to your stove, it’s time to stop and call for help. The issue could be a faulty breaker, a problem with the stove's internal wiring, or the outlet it's plugged into. These all require the expertise of an appliance repair technician or an electrician.
Typical Time and Costs
- DIY Fixes (5-15 minutes):
- Reseating a coil burner is free.
- A replacement coil element typically costs between $20 and $50, depending on the stove model.
- Professional Repair:
- An appliance technician service call usually costs between $100 and $200 just for the diagnosis.
- The total repair cost will depend on the parts and labor required, but you can expect it to be significantly more than a simple DIY parts replacement.
You're Ready for the Next Step
A non-working stove burner can feel like a major problem, but by following these steps, you can confidently diagnose the issue. You’re now prepared to either fix a simple loose connection, replace a worn-out part, or make an informed call to a professional without any guesswork.
Managing home maintenance is about staying prepared. To keep track of your appliance details, repair history, and maintenance schedules, download the Casa app. It's your always-on home advisor, helping you feel ready for whatever your home sends your way.


