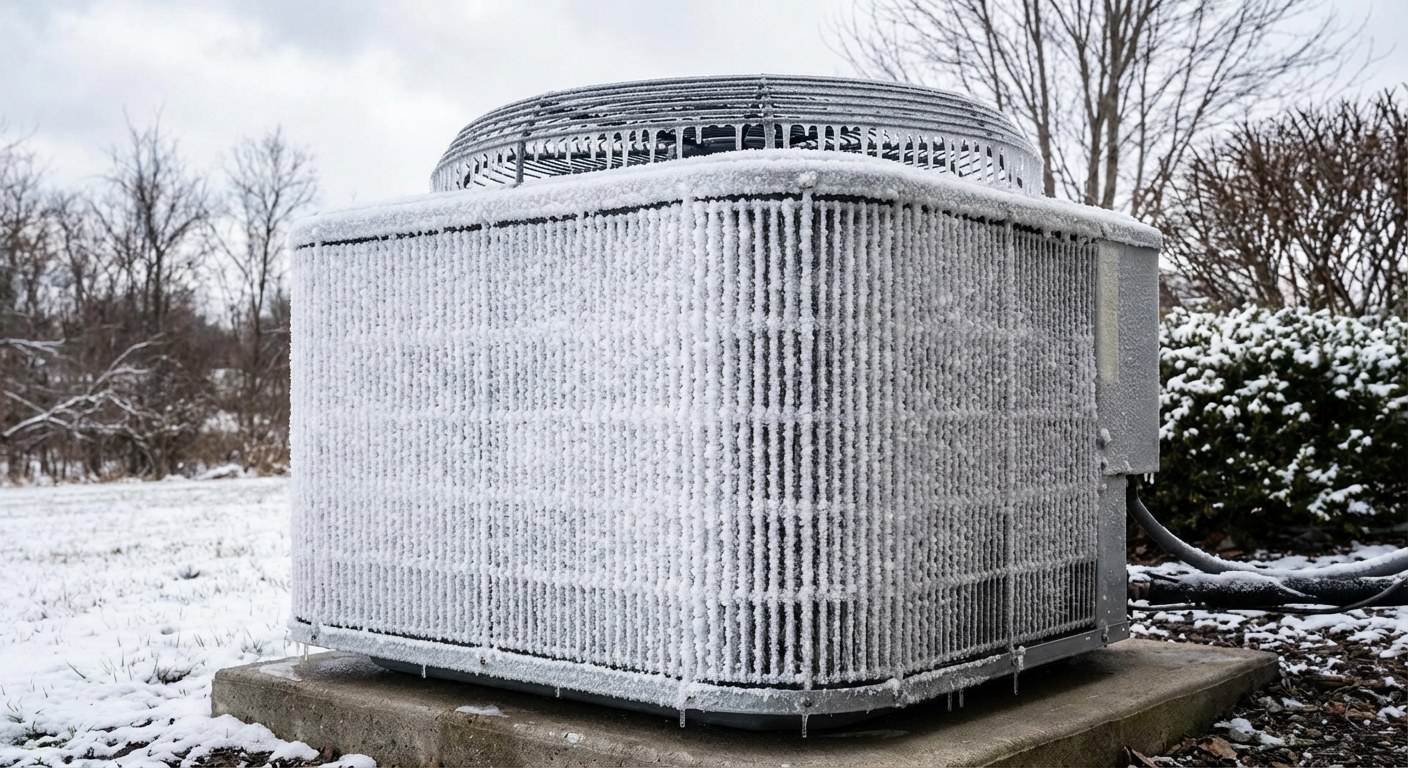
It’s important to know that a thin, even layer of frost on the outdoor coils is perfectly normal during cold, damp weather. Your heat pump is designed to handle this by running a defrost cycle periodically. The real trouble starts when the ice is thick—more than a quarter-inch—or when the unit can't seem to get rid of it.
This guide will help you understand why your heat pump is freezing up, walk you through some safe troubleshooting steps you can take yourself, and clarify when it’s time to call a professional for help.
What Causes a Heat Pump to Freeze?
A heat pump works by transferring heat. In winter, it pulls heat from the outside air and moves it into your home. This process makes the outdoor coils very cold, causing moisture in the air to condense and freeze on them. Normally, the system's defrost cycle melts this ice away. When that process fails or something else is wrong, ice can build up.
Here are the most common reasons this happens:
- Restricted Airflow: This is the leading cause. If air can't move freely over the indoor or outdoor coils, the system can't transfer heat correctly. This can be caused by a dirty air filter, blocked vents, or debris around the outdoor unit.
- Failed Defrost Cycle: The system has specific controls that tell it when to melt the ice. If a sensor, timer, or control board fails, the defrost cycle won't run, and ice will accumulate.
- Low Refrigerant: If your system has a refrigerant leak, the pressure inside the coils drops, causing them to get too cold and freeze up rapidly. This is a job for a certified technician.
- Malfunctioning Fan: The large fan on the outdoor unit is essential for pulling air across the coils. If the motor is broken or the blades are blocked, the system will freeze.
- Extreme Weather: During periods of very cold temperatures (below 20°F) combined with high humidity, snow, or freezing rain, even a perfectly functioning heat pump can struggle to keep up with ice formation.
How to Troubleshoot a Frozen Heat Pump
Before you do anything else, the first step is always safety. You’ll be working around electrical components and sharp metal fins.
Initial Safety Check
- Set your thermostat to “Off.” This will stop the system from trying to run while you inspect it.
- Turn off the power. Locate the exterior disconnect switch, which is usually a small metal box mounted on the house near the heat pump unit. Open the cover and either pull out the disconnect block or flip the switch to "Off."
Now you can safely inspect the unit and begin troubleshooting.
Step 1: Check for Airflow Obstructions
The simplest and most common problems relate to poor airflow.
Indoors: Check the Air Filter
A clogged air filter is a frequent cause of a frozen heat pump. It prevents enough warm indoor air from passing over the indoor coil, which disrupts the entire system.
- Locate your air filter, which is typically in the indoor air handler or in a return air vent in a wall or ceiling.
- Slide the old filter out. If it’s gray, dusty, and you can’t see light through it, it’s overdue for a change.
- Replace it with a new filter of the exact same size. Make sure the arrows on the filter frame point in the direction of airflow (usually toward the furnace or air handler).
Changing the filter is a fundamental part of home maintenance. Using a tool like the Casa app to set reminders can help you stay on track and prevent problems like this from happening in the first place.
Outdoors: Clear Debris
The outdoor unit also needs to breathe.
- Check for leaves, grass clippings, snow, or any other debris packed against the sides of the heat pump.
- Gently clear away any obstructions, ensuring there are at least two feet of clear space around the entire unit.
- If the coils are dirty, you can gently rinse them with a garden hose on a low-pressure setting. Do not do this if temperatures are near or below freezing.
After clearing any blockages, you can restore power and turn the system back on. If poor airflow was the only issue, the ice should begin to melt, and the unit may return to normal operation. If ice begins to form again after an hour, move to the next step.
Step 2: Test the Defrost Cycle
If airflow isn't the issue, the defrost controls might be malfunctioning. You can manually initiate a defrost cycle to see if it’s working.
- With the power restored, turn the thermostat to “Heat” and set the temperature a few degrees higher than the current room temperature. This will ensure the unit turns on.
- Observe the outdoor unit. After a few minutes of running, the fan on top should shut off, but you should still hear the compressor running (a low humming or rumbling sound). You might also see a puff of steam or vapor rise from the unit as the coils heat up to melt the ice.
- This cycle should last about 5-10 minutes. If it successfully melts most of the ice, your defrost mode is likely working. The problem might have been temporary, caused by severe weather.
If the defrost cycle doesn't start, or if it runs but fails to melt the ice, there is likely a problem with a sensor or the control board.
Step 3: Perform a Basic Fan Check
If the fan on the outdoor unit isn’t spinning when the heat pump is supposed to be running, it’s a clear sign of a problem.
- Make sure the power is turned off at the exterior disconnect switch.
- Look through the top grate. Are there any visible obstructions, like a fallen branch or ice, preventing the blades from moving?
- If it’s clear, use a long, thin object like a stick or screwdriver (with the power OFF) to gently push one of the fan blades. It should spin freely for a few rotations. If it’s stiff or makes a grinding noise, the motor bearings may be failing.
If the fan doesn't move freely or won't start when the power is on, the motor likely needs to be repaired or replaced by a professional.
When to Stop and Call an HVAC Professional
While you can handle issues related to airflow, anything more complex requires an expert. It's time to call a certified HVAC technician if:
- The ice is very thick and your attempts to clear airflow don’t solve the problem.
- The defrost cycle does not activate or fails to melt the ice.
- The outdoor fan motor is not working or feels stiff when you try to spin it by hand (with the power off).
- You hear loud or unusual grinding or clanking noises coming from the unit.
- You suspect a refrigerant leak (often indicated by ice forming on the copper lines connecting to the unit).
Do not attempt to chip away thick ice with a sharp tool, as you can easily damage the fragile aluminum fins or copper coils, leading to a very expensive repair.
Typical Time and Cost to Fix a Frozen Heat Pump
- DIY Fixes: If the problem is a dirty filter or blocked unit, your only cost is a new air filter, which is typically $10 to $30. Your time commitment is under 30 minutes.
- Professional Service Call: An initial diagnostic visit from an HVAC technician usually costs between $75 and $200.
- Professional Repairs: The cost of repairs depends entirely on the issue.
- Faulty Defrost Control Board: Replacing this can cost $250 to $600.
- Failed Fan Motor: Expect to pay $400 to $700 for a replacement.
- Refrigerant Leak: This is often the most expensive repair, as it involves finding the leak, fixing it, and recharging the system. Costs can range from $500 to over $1,500.
A Clear Path Forward
Dealing with a frozen heat pump can feel stressful, but by following a calm, methodical process, you can often identify and solve the problem yourself. Start with the simplest solutions—checking your filter and clearing debris—as they are the most common culprits. If those steps don't resolve the issue, you’ll have gathered valuable information to share with a professional, which can help them diagnose the problem more quickly.
Managing your home’s complex systems is easier when you have a plan. For clear maintenance schedules, repair guidance, and a simple way to track your home’s needs, download the Casa app. We're here to help you feel prepared and confident in your home.


