There’s nothing quite like a fresh coat of paint to completely revitalize a space. It’s one of the most impactful and budget-friendly home improvement projects you can tackle. Whether you’re covering up scuff marks, updating a dated color, or simply craving a change, painting a wall is a project that delivers instant gratification.
But let's be honest, staring at a blank wall with a can of paint and a roller can feel a little intimidating. Where do you start? What if you mess up?
Don’t worry, we’ve got you covered. Think of us as your friendly expert on the other end of the line, ready to walk you through it. This guide will break down the entire process, from the crucial prep work to that final, satisfying brushstroke. We’ll cover everything from a basic interior wall to tackling tricky repairs and even painting the exterior of your home.

Why Prep Work is 90% of a Great Paint Job
If there's one secret the pros know, it's this: a perfect paint finish is all about the preparation. Rushing this stage is the number one cause of blotchy coverage, peeling paint, and a finish that just looks… off. Before you even think about opening that paint can, let's assess your project.
First, take a good look at your wall.
- Is it indoors or outdoors? This determines the type of paint and prep you’ll need.
- What’s the wall’s condition? Are there cracks, nail holes, or stains? Is the surface glossy, or is there old wallpaper that needs to go?
- What is the wall made of? Drywall, plaster, brick, or wood siding will each require a slightly different approach.
Answering these questions first will save you headaches down the road and ensure your hard work lasts for years to come.
Part 1: How to Paint an Interior Wall
Painting an interior wall is a classic DIY project and a fantastic place to start. Let’s break it down based on the condition of your wall.
The Basic Paint Job: For Walls in Good Condition
If your wall is smooth, clean, and free of any major damage, you’re in luck! This is the most straightforward painting project.
Difficulty: Moderate
Working Time: 1 hour
Total Time: 3-4 hours (including dry time)
What You'll Need:
- Drop cloth
- Microfiber cloth or sponge
- Mild soap and water
- Painter's tape
- Interior paint (your chosen color and sheen)
- Paint tray
- Smooth-surface paint roller (3/8-inch nap is great for drywall)
- Angled paintbrush (for cutting in)
Step-by-Step Guide:
- Prep the Room: Move furniture away from the wall or cover it completely. Lay a drop cloth on the floor to catch any drips.
- Clean the Wall: Even if it looks clean, walls collect dust and grime. Wipe it down with a damp microfiber cloth and a little mild soap. Let it dry completely.
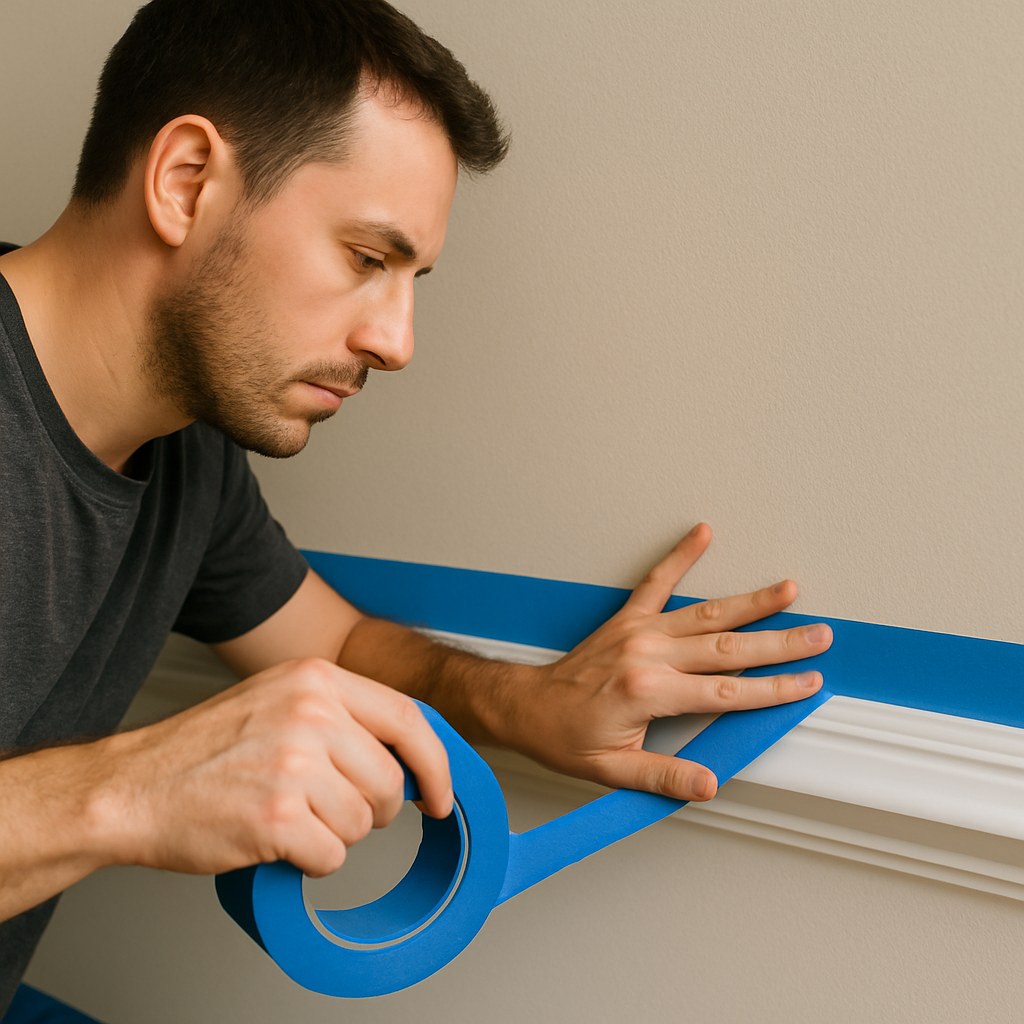
- Tape It Off: Apply painter's tape along the trim, baseboards, and ceiling line for crisp, clean edges. Press the tape down firmly to prevent paint from seeping underneath.
- Stir Your Paint: Open your paint can and stir it thoroughly to ensure the color is consistent. Pour some into your paint tray.
- Cut In the Edges: Before you start rolling, use your angled paintbrush to "cut in." This means painting a 2-3 inch border along the tape lines and in the corners where a roller can’t reach.
- Roll the First Coat: Load your roller with paint, making sure it's evenly coated but not dripping. Start rolling from the top of the wall downwards in a large “W” or “M” pattern. This helps distribute the paint evenly and avoid roller marks. Overlap each stroke slightly until the wall is covered.
- Let It Dry: Patience is key! Check the paint can for the recommended drying time before applying a second coat. Rushing this can cause the first coat to peel off with the roller.
- Apply the Second Coat: Repeat the cutting in and rolling process for a second time. A second coat is almost always necessary for a rich, uniform color.
- The Big Reveal: Once the second coat is dry to the touch, carefully remove the painter's tape. Pull it off at a 45-degree angle for the cleanest line.
Handling Minor Repairs: Cracks, Dings, and Holes
Have a few nail holes or a small crack? No problem. A little spackle will make them disappear, leaving you with a flawless surface.
Difficulty: Moderate
Working Time: 2 hours
Total Time: 4-5 hours (including dry time)
What You'll Need (in addition to the basic list):
- Putty knife
- Spackle or patching compound
- Medium-grit sandpaper
- Stain-blocking primer
Step-by-Step Guide:
- Prep and Clean: Follow the first two steps from the basic guide (protect the room and clean the wall).
- Scrape and Open: Use a putty knife to gently scrape away any loose paint chips around the damaged area. For cracks, it's helpful to use the corner of the putty knife to slightly widen the crack into a "V" shape, which helps the spackle adhere better.
- Fill with Spackle: Scoop a small amount of spackle onto your putty knife and press it firmly into the hole or crack. Smooth it flush with the wall. You may need to apply a second, thin layer after the first one shrinks slightly.
- Let It Dry: Give the spackle plenty of time to dry completely, according to the product's instructions.
- Sand It Smooth: Once dry, lightly sand the patched areas with medium-grit sandpaper until they are perfectly smooth and level with the rest of the wall.
- Prime the Patches: This is a crucial step! Dab a small amount of stain-blocking primer over the patched spots. This prevents the spackle from absorbing paint differently than the rest of the wall, a phenomenon known as "flashing."
- Paint Away: Once the primer is dry, you can proceed with painting the entire wall as described in the basic guide.
The Big Project: Removing Wallpaper or Painting Over Glossy Finishes
This is a more involved job, but the results are transformative. Getting rid of old wallpaper or a high-gloss finish requires extra effort in the prep stage.
Difficulty: Hard
Working Time: 4 hours
Total Time: 8+ hours (including dry time)
Step-by-Step Guide to Removing Wallpaper:
- Protect and Power Down: Lay down drop cloths and turn off the electricity to the room from the electrical panel. Remove all outlet covers and switch plates.
- Score the Paper: Use a wallpaper scoring tool to create tiny perforations all over the wallpaper. This allows your removal solution to penetrate the paper and dissolve the adhesive.
- Soak and Scrape: Mix warm water with a little dish soap (or a dedicated wallpaper removal solution) in a spray bottle. Spray a section of the wall and let it soak for about 10-15 minutes. Use a putty knife to gently scrape the loosened paper off. Work in small sections and be patient.
- Clean the Glue: Once all the paper is gone, wash the wall with a sponge and warm water to remove any residual glue.
- Repair and Smooth: Let the wall dry completely. Now, inspect for any damage and patch holes or gouges with spackle. Sand the entire wall lightly to create a smooth, uniform surface for priming.
- Prime the Wall: Apply a full coat of stain-blocking primer. This is essential for sealing the wall and ensuring your new paint color looks its best.
- Paint: Once the primer is dry, apply two coats of your new interior paint.
Part 2: How to Paint an Exterior Wall
Painting your home's exterior is a bigger undertaking, but it dramatically boosts curb appeal and protects your home from the elements. The prep work here is even more critical.
Painting Brick or Concrete (Masonry Walls)
Difficulty: Hard
Working Time: 4 hours
Total Time: 2 days (to allow for drying)
Key Steps:
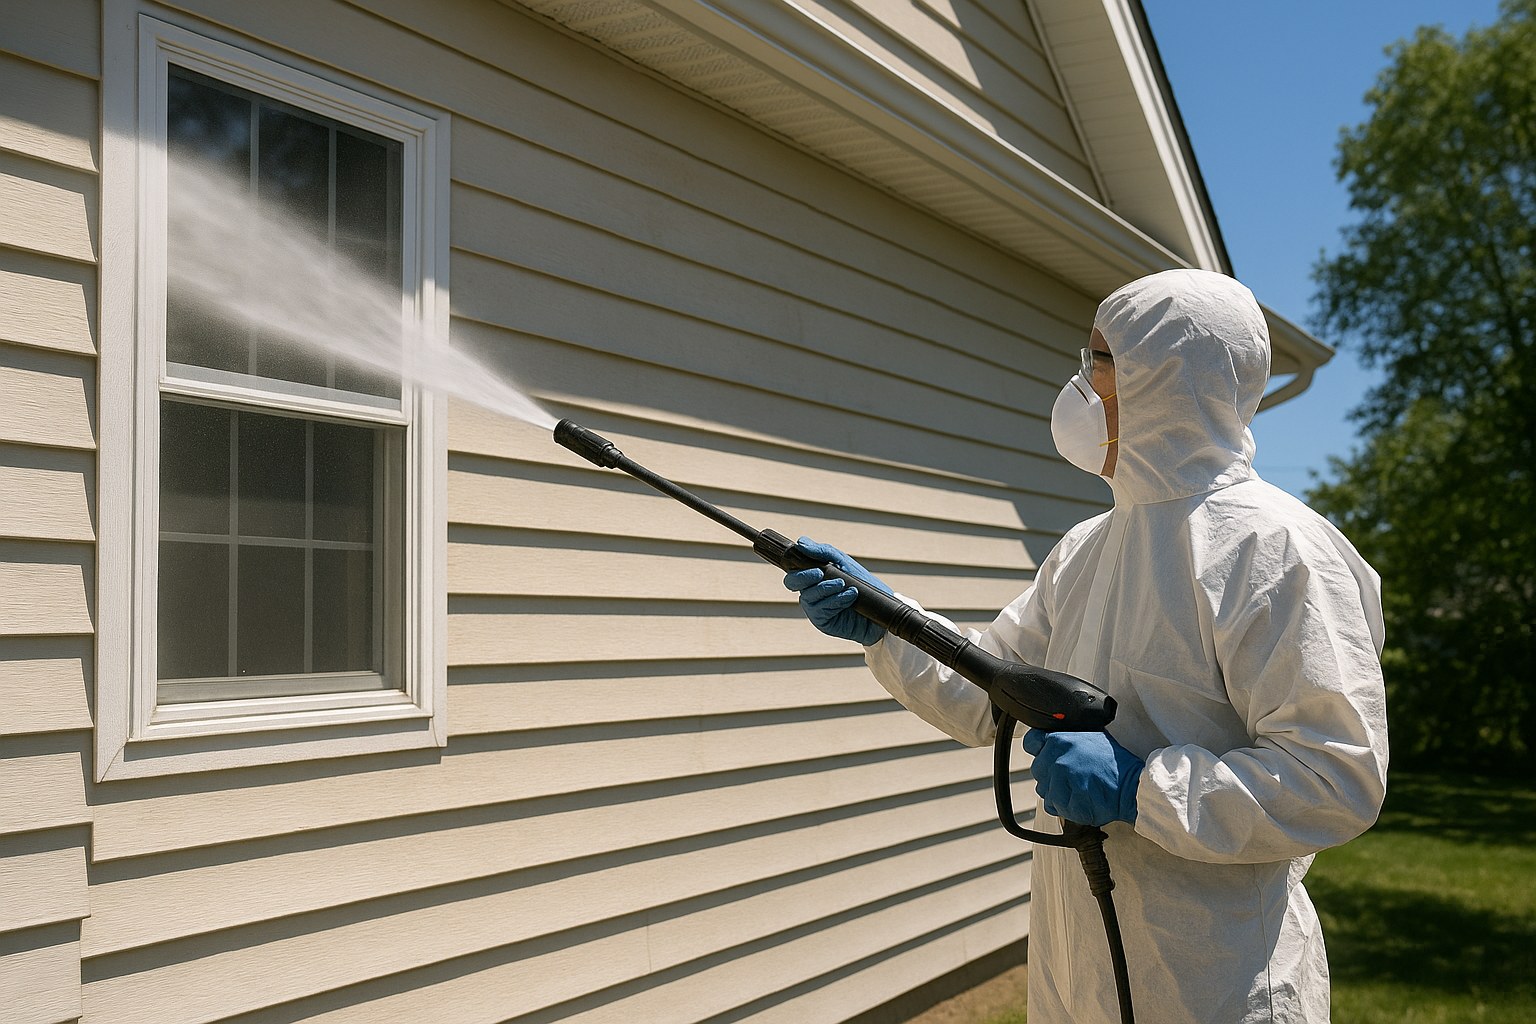
- Clean Thoroughly: The wall must be completely free of dirt, mildew, and efflorescence (the white, powdery deposits on masonry). Scrub the wall with a stiff brush and mild detergent, then rinse thoroughly with a hose or pressure washer. Let it dry for at least 24 hours.
- Repair Cracks: Use acrylic caulk or a masonry crack filler to repair any small cracks.
- Prime with the Right Product: Use a dedicated masonry primer. This product is designed to bond to the porous surface of brick or concrete and resist moisture. Apply one full coat with a rough-surface paint roller (at least a 3/4-inch nap).
- Apply Exterior Paint: Once the primer is dry, apply two coats of high-quality exterior acrylic latex paint. This type of paint is durable, flexible, and holds up best against weather.
Painting Wood or Siding Walls
Difficulty: Hard
Working Time: 4 hours
Total Time: 1-2 days
Key Steps:
- Wash and Scrape: Clean the wall with a hose or pressure washer. Once dry, use a paint scraper to remove all loose, peeling, or flaking paint.
- Sand and Repair: Sand any rough spots smooth. Use an exterior wood filler to patch any holes or gaps, then sand the filler smooth once it's dry.
- Spot-Prime: You don't always need to prime the whole wall. Apply a coat of exterior wood primer to any bare wood spots or areas where you applied filler.
- Paint: Once the primer is dry, apply two coats of premium exterior paint, making sure to brush it into the grooves of the siding and roll the flat surfaces.
How Much Does It Cost: DIY vs. Hiring a Pro?
Painting is a project where doing it yourself can lead to significant savings.
- DIY Cost: For a standard 12x12 foot room, you can expect to spend $50 - $150 on paint, primer, and supplies.
- Professional Cost: According to Forbes, hiring a professional to paint the same room can cost anywhere from $400 to $950, depending on your location and the complexity of the job.
By investing a little bit of your time, you not only save money but also gain the satisfaction of transforming your own space.
Your Home, Your Masterpiece
Painting a wall is more than just a home maintenance task—it's an opportunity to express your style and create a space you love. With the right preparation and a little patience, you can achieve a professional-quality finish that will make you proud.
Feeling ready to pick up that roller? For more detailed guides, tool recommendations, and access to a network of trusted professionals for those jobs you'd rather leave to an expert, download the Casa app today. We’re here to help you manage and love your home, one project at a time.


