There are few things more satisfying than seeing your houseplants thrive. But that satisfaction can quickly turn to frustration when you spot a line of tiny ants marching in and out of your favorite ficus. It’s a common problem, but that doesn’t make it any less unsettling. You might wonder: Are they harming my plant? Are they going to infest my whole house?
Don't panic! While ants themselves don't typically eat your plants, their presence is often a sign of a bigger issue. The good news is that you can absolutely solve this problem yourself. Think of me as your friendly expert on the other end of the line, ready to walk you through exactly what to do.
In this guide, we'll diagnose why the ants have moved in, explore safe and effective ways to evict them, and make sure your plant’s pot doesn't have a “For Rent” sign on it for future pests.
Why Are Ants Attracted to My Potted Plants?
Before we jump into the "how," let's quickly cover the "why." Understanding the cause will help you choose the right solution and prevent future invasions. Ants are usually in your plants for one of two main reasons:
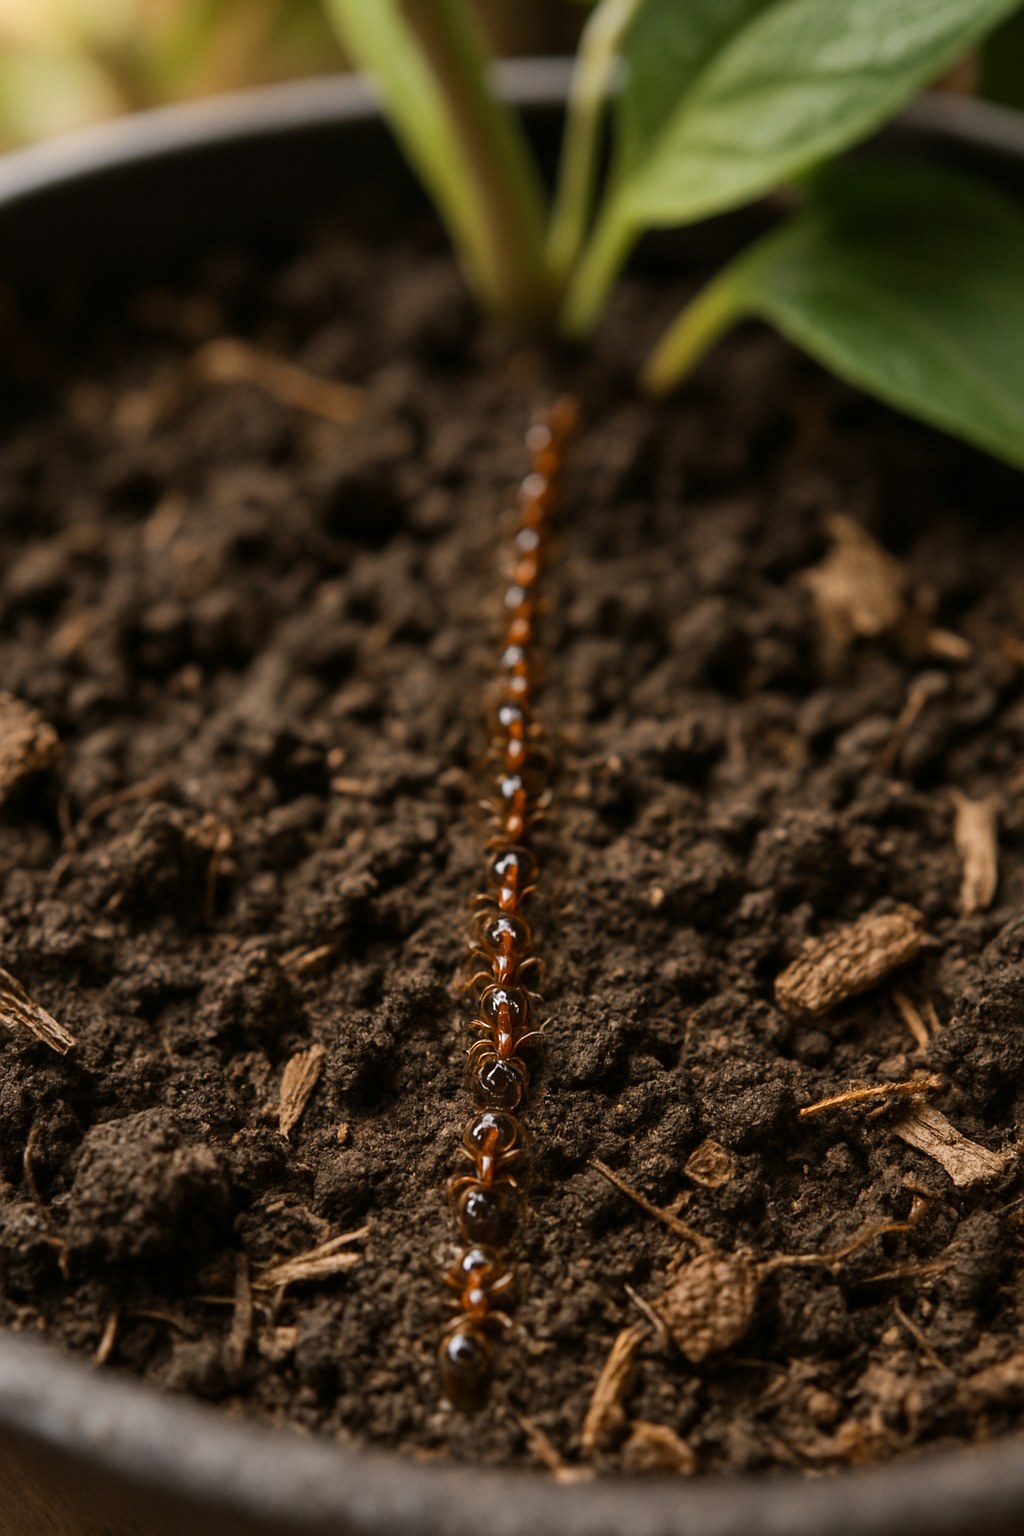
- A Great Place to Live: The soil in your potted plant is like a luxury high-rise for an ant colony. It’s protected from the elements, consistently moist, and soft enough to tunnel through easily. If you see little mounds of dirt or ants disappearing into holes in the soil, they’ve likely set up a nest.
- A Delicious Food Source: More often than not, ants are visiting your plant because it’s a reliable food source. They aren't eating the plant itself but are "farming" other tiny pests like aphids, mealybugs, or scale insects. These pests feed on your plant's sap and then excrete a sugary, sticky substance called honeydew. To ants, honeydew is an all-you-can-eat buffet. In return for the food, the ants protect these harmful pests from predators, creating a frustrating cycle for your plant's health.
Step 1: Let's Play Detective and Assess the Situation
First things first, let's figure out exactly what we're dealing with. Grab a pair of gloves and a flashlight, and let's get a closer look.
- Examine the Plant and Pot: Carefully inspect the entire plant—the stem, the tops and undersides of the leaves, and the soil surface.
- Follow the Trail: Look for a visible trail of ants. Where are they coming from? Where are they going? Check the floor, shelf, or ground around the pot. This can help you determine if the nest is in the pot or somewhere else nearby.
- Check for Other Pests: Look closely for the tiny insects that produce honeydew. Aphids are small, pear-shaped bugs, often green or black. Mealybugs look like tiny white cottony spots. Scale can look like small, hard bumps on the stems and leaves. If you see these, you've likely found the source of the ant's food.
- Look for a Nest: Do you see ants emerging from a specific hole in the soil? Is there fine, disturbed soil on the surface? This is a strong indicator that the ant colony has moved in.
Once you know whether the ants are nesting in the soil or just visiting for food, you can choose the right treatment plan.
Step 2: How to Get Rid of Ants Nesting in the Soil
If you’ve determined the ant colony is living in your pot, it’s time to serve an eviction notice. You have several options, depending on whether the plant is indoors or outdoors and whether you prefer a natural or chemical approach.
For Indoor Plants
Natural Method: Diatomaceous Earth (DE)
This is a fantastic, non-toxic option for indoor use. Diatomaceous earth is a fine powder made from fossilized algae. To an ant, it’s like crawling over microscopic shards of glass, which damages their exoskeleton and causes them to dehydrate.
- Let the Soil Dry Slightly: DE works best when it's dry. If possible, wait a day after watering so the top layer of soil is not damp.
- Apply a Thin Layer: Sprinkle a light but complete layer of food-grade diatomaceous earth over the entire soil surface.
- Mix it In: Use a small trowel or a fork to gently mix the DE into the top half-inch of soil.
- Wait to Water: Avoid watering for at least 12-24 hours to give the powder time to work.
Chemical Method: Ant Bait
Ant baits are a highly effective chemical solution. They contain a slow-acting poison mixed with a food attractant. The ants carry the bait back to the nest to share with the colony and the queen, eliminating the problem at its source.
- Choose an Indoor Bait: Make sure you use a bait specifically designed for indoor use, which usually comes in a liquid or gel form.
- Apply to the Soil: Apply several drops of the ant bait directly onto the soil surface near any visible ant tunnels or areas of high activity.
- Safety First: Most importantly, keep children and pets away from the treated plant until the bait is completely gone or has dried. Always follow the product’s safety instructions.
- Clean Up: Wash your hands thoroughly with soap and water after handling the bait.
For Outdoor Plants
Natural Method: Soapy Water Drench
This simple concoction is surprisingly effective for outdoor pots. The soap helps break down the ants' protective outer layer.
- Mix the Solution: Combine 2 tablespoons of dish soap with 1 quart of warm water in a watering can.
- Drench the Soil: Slowly pour the soapy water solution over the soil, making sure to saturate the entire pot and any visible ant tunnels.
- Wait and Rinse: Let the solution sit for about 30 minutes, then lightly rinse the soil with plain water to wash the soap away from the plant’s roots.
- Create a Barrier: Once the area is dry, sprinkle a ring of diatomaceous earth on the ground around the base of the pot to prevent ants from re-entering.
Chemical Method: Granular Ant Bait
For stubborn outdoor infestations, a granular bait can be very effective.
- Safety Gear: Put on a pair of rubber gloves before handling the product.
- Choose the Right Bait: Look for an ant bait containing an active ingredient like hydramethylnon.
- Apply the Granules: Sprinkle the granules evenly over the soil surface inside the pot and on the ground around the pot’s base, following the package directions for the correct amount.
- Activate the Bait: Lightly water the granules (as per the product label) to activate them. Keep pets and children away from the treated area until it has completely dried.
Step 3: What If the Ants Are Just Visiting for Food?
If your inspection revealed that the ants aren't nesting but are farming other pests, your focus should shift. Get rid of the food source, and the ants will move on.
- Treat the Honeydew-Producing Pests: Your best weapon here is insecticidal soap. You can buy a pre-made spray or make your own with a few drops of mild dish soap in a spray bottle of water. Thoroughly spray all surfaces of the plant—especially the undersides of leaves and stems. This will kill the soft-bodied pests like aphids and mealybugs.
- Clean Up the Plant: After treating the pests, wipe down the leaves and stems with a damp cloth or a cotton swab to remove any remaining honeydew residue. This sticky substance can lead to sooty mold, so it's good to get it off.
- Remove Other Attractants: Make sure there are no other food sources near your plant. Clean up any fallen leaves or debris from the soil, and move the plant away from pet food bowls, fruit baskets, or trash cans.
Step 4: Prevent Future Invasions by Improving Drainage
Ants love moisture, and soil that stays soggy for long periods is a prime target. Poor drainage is also a leading cause of root rot, so fixing this is a win-win for your plant.
- Check for Drainage Holes: Does your pot have holes in the bottom? If it's sitting inside a decorative pot (a cachepot), take it out and check. Water needs a way to escape.
- Add More Holes: If your pot doesn't have holes, you can carefully add a few using a drill.
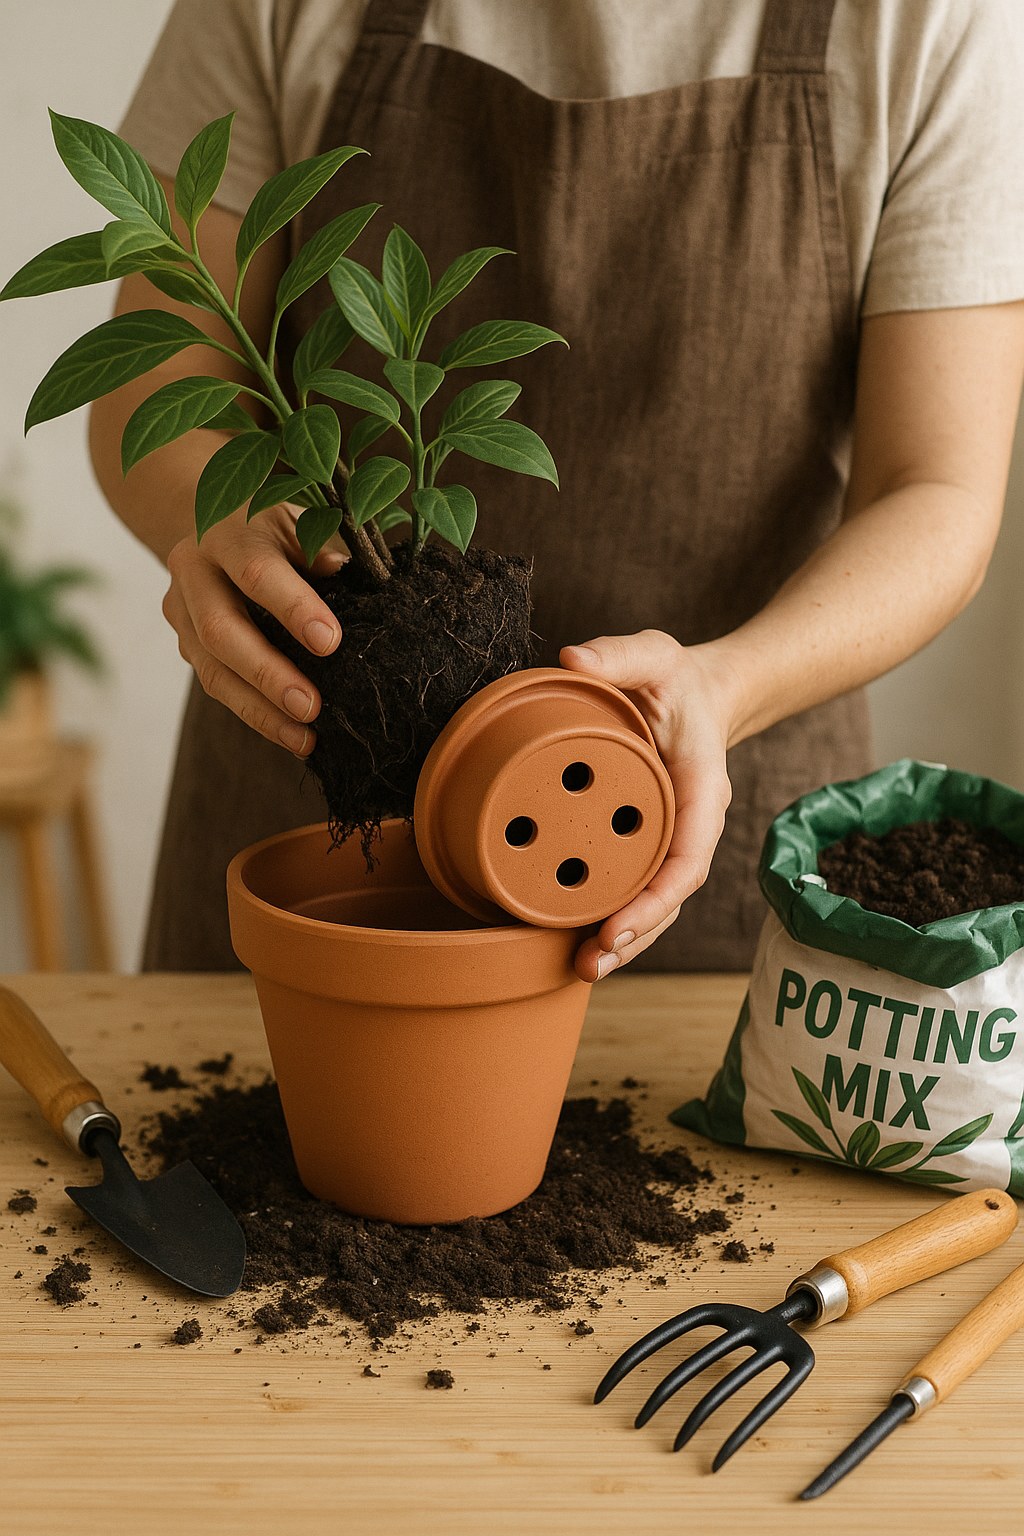
- Repot with Fresh Soil: The best long-term solution is to repot your plant. Use a high-quality, well-draining potting mix. You can amend it with perlite or orchid bark to increase aeration. This creates a less hospitable environment for ants and a healthier one for your plant's roots.
- Water Correctly: Allow the top inch or two of soil to dry out between waterings. This simple change can make a huge difference in preventing pest problems.
Step 5: Monitor and Follow Up
Your work isn't quite done after the initial treatment. For the next week, check on your plant daily. Look for any new ant activity. If you used a treatment like diatomaceous earth that gets washed away with watering, you may need to reapply it. If after a week you're still seeing a significant number of ants, it may be time to consider calling a professional, as the infestation could be part of a larger issue in your home. A one-time visit from an exterminator for ants typically costs between $150 and $300, which highlights the value of getting it right with a DIY approach first!
Your Plant and Home Are in Good Hands
Dealing with pests is a part of homeownership and plant care, but with the right approach, you can handle it confidently. By identifying the root cause, choosing the right treatment, and taking preventative steps, you can get rid of ants in your potted plants and keep them from coming back.
For more expert advice on everything from pest control to plumbing, download the Casa app today! Casa is your trusted partner for home maintenance, offering step-by-step DIY guides for problems you can fix and connecting you with vetted professionals for the jobs you can't. Let us help you keep your home running smoothly, one project at a time.


