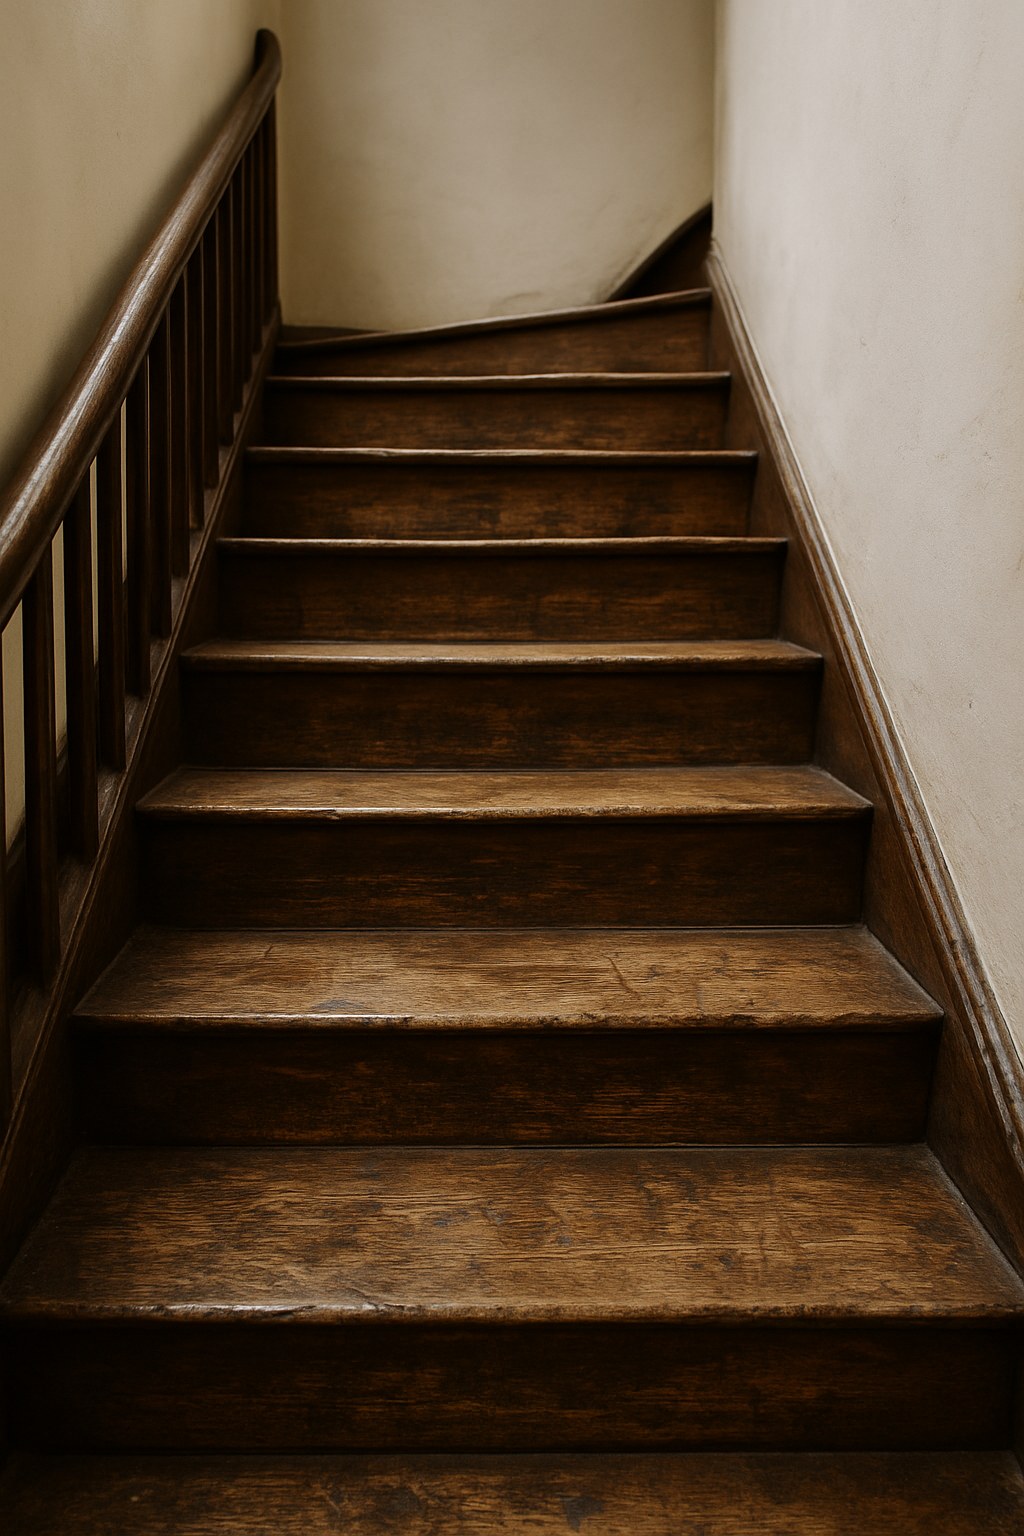
Your staircase is one of the hardest-working features in your home. It handles constant foot traffic, day in and day out. Over time, that wear and tear can start to show, turning a central feature of your home into an eyesore—or worse, a safety hazard. Are you dealing with spongy steps, annoying squeaks, or unsightly cracks and scratches?
Don't worry, you're not alone. The good news is that you can often fix these common issues yourself with a little bit of know-how and a weekend of work. A well-maintained staircase not only looks beautiful but is crucial for your family's safety. According to the National Safety Council, falls are one of the leading causes of unintentional injuries at home, with over a million stair-related incidents happening each year.
So, let's walk through this together. In this guide, I'll help you inspect your stairs for safety, determine the best repair method for your stair type (wood or concrete), and give you step-by-step instructions to get them back in top shape.
Step 1: Start with a Thorough Safety Inspection
Before we even think about cosmetic fixes, we need to make sure your staircase is structurally sound. A pretty staircase that isn’t safe is a major problem. Grab a tape measure and let’s give your stairs a quick but thorough check-up.
- Look from the Bottom: Stand at the base of your staircase and look up along its length. Do you see any obvious sagging or bowing in the middle? This could indicate a problem with the stair stringers—the diagonal boards that support the treads and risers.
- The Slow Walk Test: Walk slowly up and down the stairs, putting your weight on the center and then on the sides of each step. Do any of the treads feel "spongy," soft, or like they're moving under your feet? Listen for any loud creaks or groans that sound more serious than a simple squeak.
- Inspect for Cracks and Rot: Examine each tread and riser closely. Look for cracks in the wood or concrete. Use your tape measure to check the width of any cracks you find.
When to Stop and Call a Professional
This is the most important part of the inspection. If you answered "yes" to any of the following, your problem is likely beyond a simple DIY fix:
- Do any steps feel noticeably spongy, loose, or unstable?
- Did you find any cracks that are wider than 1/4 inch?
- Do you see signs of wood rot (dark, soft, or crumbly wood)?
- Is the entire staircase visibly sagging?
These are red flags for serious structural issues. In this case, it's time to pause the project and call a professional carpenter or a structural engineer. Your safety is the top priority, and they have the expertise to diagnose and fix deep-seated problems correctly.
If your stairs passed the safety check, great! Let's move on to the repairs.
Step 2: How to Repair and Refinish Worn Wooden Stairs
Wooden stairs bring warmth and character to a home, but they're prone to scratches, dents, and fading. If your inspection revealed that the wear is mostly on the surface, you can bring them back to life with some sanding and refinishing.
What You'll Need:
- Tools: Random-orbit sander, shop vacuum, painter's tape, putty knife, brush.
- Materials: Sandpaper (80, 120, and 220-grit), safety goggles, dust mask, gloves, tack cloth or damp rags, water-based polyurethane, wood filler (optional).
Let's Get Started: Sanding and Refinishing Your Treads
This process can take a full day, including drying time, so plan for a weekend project.
- Prep the Area: Start by thoroughly cleaning your stairs. Then, apply painter's tape along the walls, baseboards, and risers (if you're only refinishing the treads) to protect them from the sander and finish.
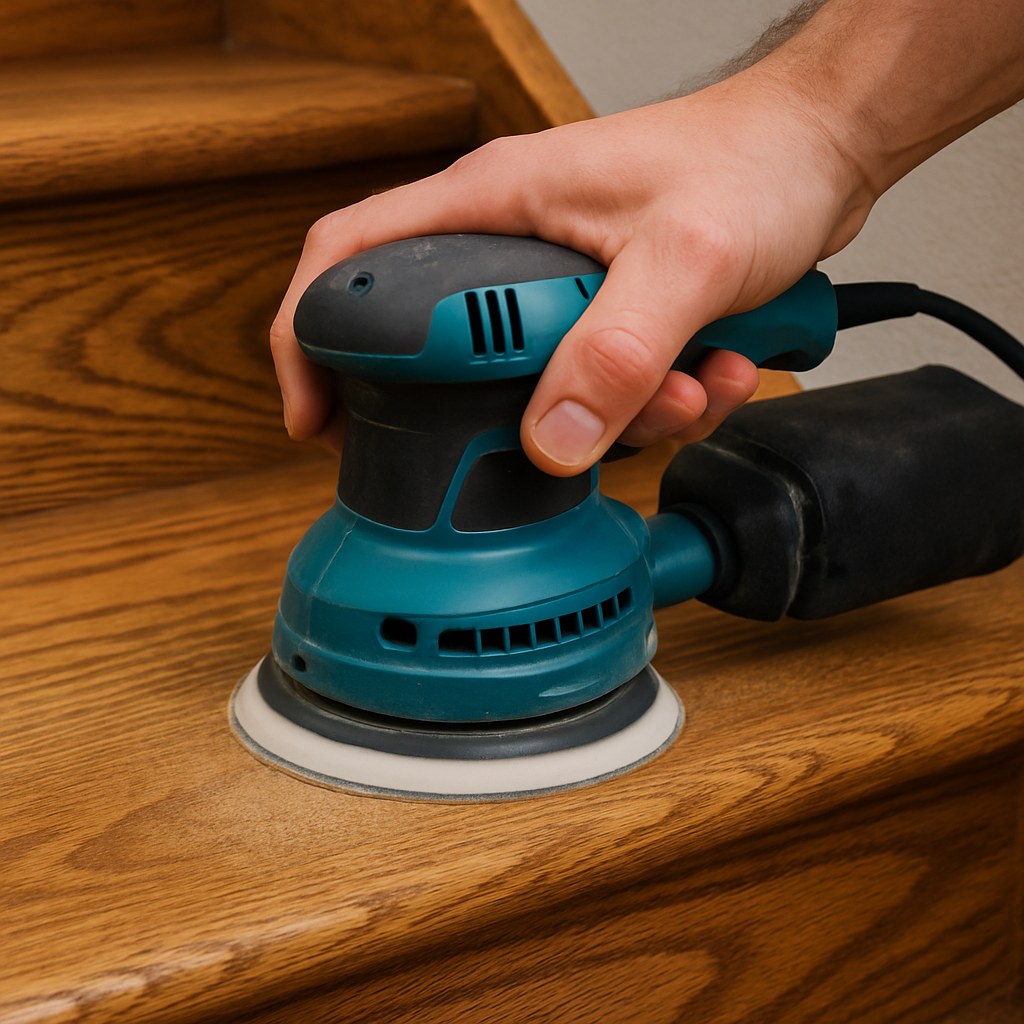
- The First Sand (80-Grit): Put on your safety goggles and dust mask. Fit your random-orbit sander with 80-grit sandpaper. This coarse grit is for removing the old finish and surface-level imperfections. Sand each tread evenly, moving with the grain of the wood, until you've exposed the bare wood.
- Clean Up: This part is messy. Use a shop vacuum to suck up all the sanding dust from the stairs and surrounding areas. Afterward, wipe each tread with a damp cloth or tack cloth to pick up any remaining fine dust.
- The Second Sand (120-Grit): Switch to 120-grit sandpaper. This will smooth out the surface left by the coarser grit. Sand each tread again, and then repeat the vacuuming and wiping process. A perfectly clean surface is essential for a flawless finish.
- Apply the First Coat of Polyurethane: Open your can of water-based polyurethane and stir it slowly and gently—don't shake it, as this creates bubbles that will mar your finish. Using a quality brush, apply a thin, even coat to each tread, starting from the top and working your way down. Follow the direction of the wood grain.
- Dry and Lightly Sand Again (220-Grit): Let the first coat dry completely. This usually takes about 4 hours, but check the product label. Once dry, the wood grain may feel slightly raised. Lightly sand the treads by hand with 220-grit sandpaper to knock down this texture. Wipe away the dust.
- Apply the Final Coat: Apply a second thin coat of polyurethane. This will provide a durable, beautiful finish. Let it cure overnight (or for at least 24 hours) before allowing any foot traffic.
Step 3: How to Patch Minor Damage on Concrete Stairs
Concrete stairs, often found in basements, garages, or as front steps, are incredibly durable but can still chip and spall over time. For small imperfections, a concrete patch is an easy and effective fix.
This DIY method is perfect for chips or spalls that are less than 1/4 inch deep and no wider than a credit card. For larger, deeper damage, or widespread cracking, it's best to consult a professional mason.
What You'll Need:
- Tools: Stiff wire brush, broom, small bucket, putty knife.
- Materials: Safety goggles, gloves, spray bottle with water, concrete patch compound.
Let's Patch Those Steps:
This is a quick job that you can complete in under an hour, plus curing time.
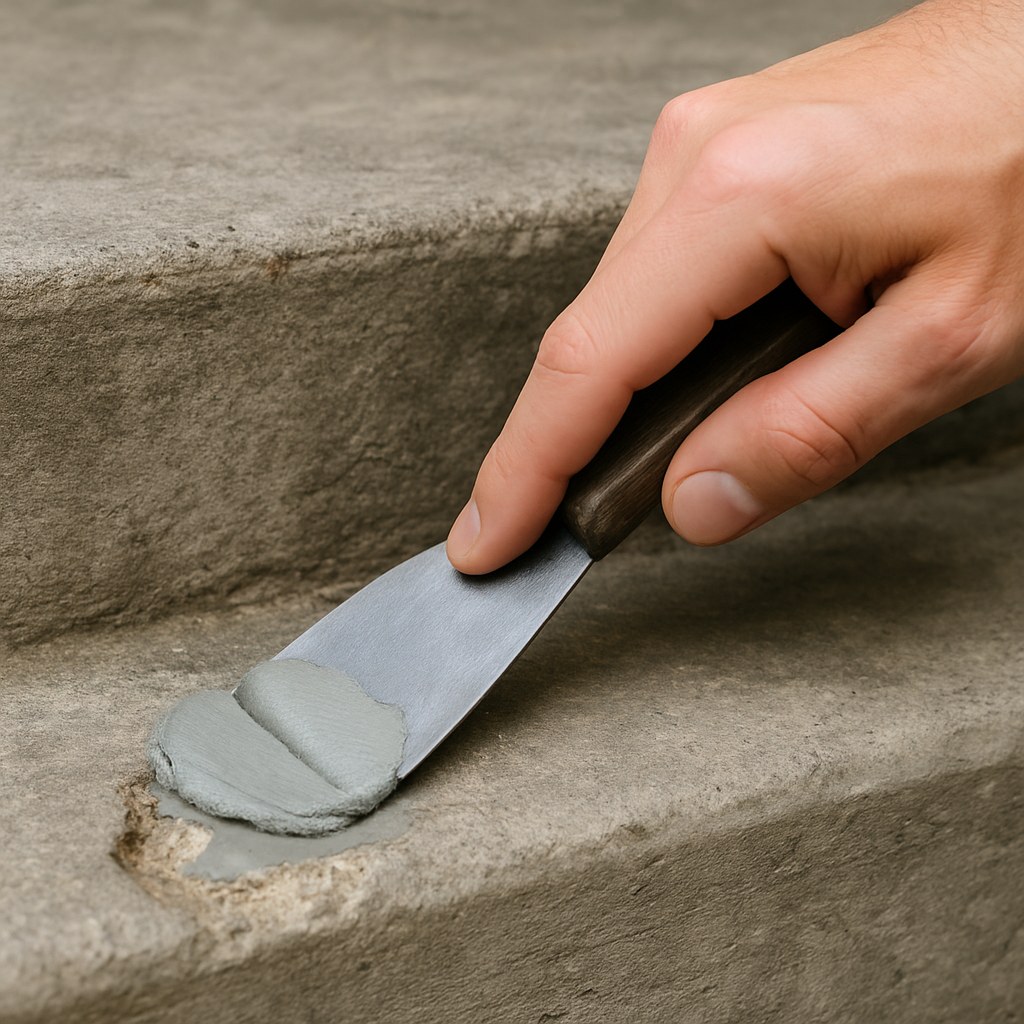
- Prep the Damaged Area: Put on your safety glasses and gloves. Use a stiff wire brush to vigorously scrub away any loose concrete, dirt, or debris from the chipped area. A clean surface is crucial for the patch to bond properly. Sweep the area clean.
- Dampen the Surface: Lightly mist the damaged spot with water from a spray bottle. You want the surface to be damp, but with no standing water. This prevents the dry concrete from sucking the moisture out of the patch mix too quickly, which can cause a weak bond.
- Mix the Patching Compound: In a small bucket, mix the concrete patch compound according to the package directions. Only mix as much as you can use within 10-15 minutes, as it begins to harden quickly.
- Apply and Smooth: Scoop up some of the compound with your putty knife and press it firmly into the chip or spall. Overfill it slightly. Then, use the flat edge of the putty knife to smooth the patch, making it flush with the surrounding concrete surface.
- Let It Cure: Allow the patch to cure for the time specified on the product label, which is typically at least 2-3 hours. Avoid walking on the repaired area until it has fully hardened.
DIY vs. Hiring a Pro: A Quick Cost Breakdown
- DIY Wooden Stair Refinishing: You can expect to spend around $100 - $200 on sandpaper, polyurethane, and brushes, assuming you own or can borrow a sander.
- DIY Concrete Stair Patching: This is a very budget-friendly fix, typically costing less than $40 for the patch compound and a wire brush.
- Hiring a Professional: To have a professional refinish a wooden staircase, costs can range from $500 to $2,000+, depending on the size and complexity. For concrete repair, hiring a mason for anything beyond minor patching can cost anywhere from $300 to over $1,000, according to HomeAdvisor.
Bring Your Stairs Back to Life with Casa
Fixing worn-down stairs is a rewarding project that boosts your home's safety and curb appeal. By following these steps, you can confidently tackle surface-level repairs on both wood and concrete staircases.
Feeling empowered to take on this project? That's what we love to hear! But we also know that sometimes a question comes up mid-project, or a small fix turns out to be bigger than you thought.
That’s exactly why we created the Casa app. It’s your go-to partner for every home maintenance task. Inside the app, you’ll find more detailed guides, handy tool lists, and if you ever feel out of your depth, you can connect with our network of trusted, vetted professionals in just a few taps.
Download the Casa app today and turn your home maintenance to-do list into a to-done list. Let's make your home safer and more beautiful, one step at a time.


