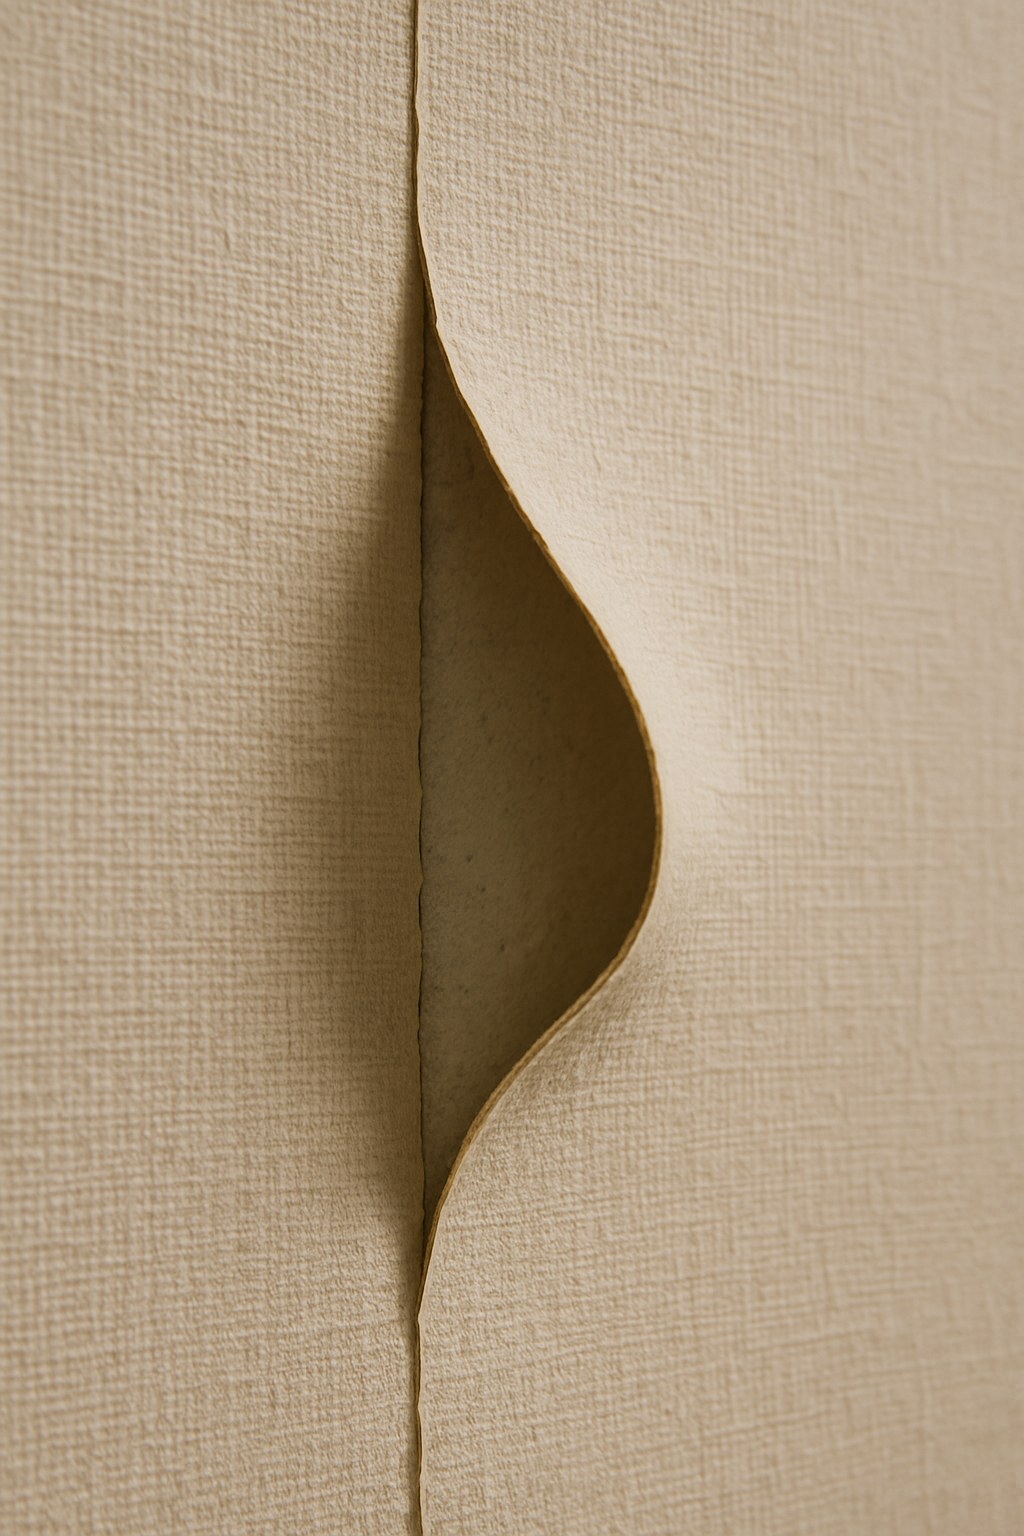
Wallpaper has a unique way of adding personality, texture, and warmth to a room. But when you notice those crisp, clean seams starting to lift and peel away from the wall, it can be disheartening. That perfect pattern is suddenly interrupted, and it can make the whole space feel a bit neglected.
The good news is that you don't have to live with it or immediately call in a professional. Fixing a separating wallpaper seam is one of the most common—and achievable—DIY home repairs. Whether the culprit is humidity, age, or a less-than-perfect installation, you can often fix it in under an hour with just a few simple tools.
Think of me as your expert on the other end of the line, ready to walk you through it. In this guide, we'll cover everything from figuring out what’s causing the problem to making a seamless, durable repair that will have your walls looking flawless again.
Why Is My Wallpaper Peeling? Common Causes
Before we jump into the repair, it helps to understand why your wallpaper is separating in the first place. Identifying the cause can help you prevent it from happening again.
- Humidity is the #1 Culprit: High-moisture environments are tough on wallpaper adhesive. This is why you often see peeling seams in bathrooms, kitchens, laundry rooms, or homes in humid climates. Steam and moisture can slowly weaken the glue's bond over time.
- Improper Installation: The original installation process is critical. If the wall wasn't properly cleaned and primed, or if the wrong type of adhesive was used, the wallpaper may never have formed a strong, lasting bond.
- Temperature Fluctuations: Walls naturally expand and contract with changes in temperature. These subtle movements, especially near windows or exterior walls, can put stress on the seams and cause them to pull apart.
- Age: Like most things, wallpaper adhesive has a lifespan. Over many years, it can dry out, become brittle, and lose its sticking power, leading to peeling edges.
- Underlying Wall Issues: Sometimes, the problem isn't the wallpaper but the wall beneath it. Hidden moisture from a slow leak or issues with the drywall or plaster can cause the paper to lift.
Understanding the "why" sets you up for a successful fix. Now, let’s figure out if this is a simple repair or a sign of a bigger issue.
Step 1: Assess the Damage – Repair or Replace?
Your first move is to play detective. Take a slow walk around the room and carefully inspect your walls. What you find will determine whether you can proceed with a quick DIY fix or if you need to consider a more extensive solution.
Here’s what to look for:
- Count the Peeling Seams: How widespread is the problem? If you're only dealing with one or two lifting seams, a simple repair is likely all you need. However, if you find multiple seams separating on several walls, it could indicate a systemic issue with the original installation or a broader humidity problem.
- Check the Wallpaper's Condition: Gently lift a corner of the peeling paper. How does it feel? If it’s flexible and sturdy, you’re in good shape for a repair. If it feels dry, brittle, cracks, or tears with minimal effort, the paper itself is deteriorating. Re-gluing brittle paper is often a temporary fix at best, as it will likely tear again.
- Look for Damp Spots or Stains: Pay close attention to the wall behind the peeled-back wallpaper. Do you see any dark spots, discoloration, or feel any dampness? This is a major red flag. Water stains suggest a leak or a condensation problem that must be addressed before you even think about repairing the wallpaper. Simply gluing it back down will trap the moisture and could lead to mold growth and more significant wall damage.
The Verdict: When to Call a Professional
- You Should Repair It Yourself If: You have only one or two lifting seams, the wallpaper is in good condition (not brittle), and there are no signs of moisture on the wall.
- You Should Call a Professional If: You notice widespread peeling across multiple seams, the wallpaper is brittle and tears easily, or you find any evidence of dampness or water damage. A professional can help diagnose a hidden moisture issue or advise if it’s time to strip the old paper and start fresh.
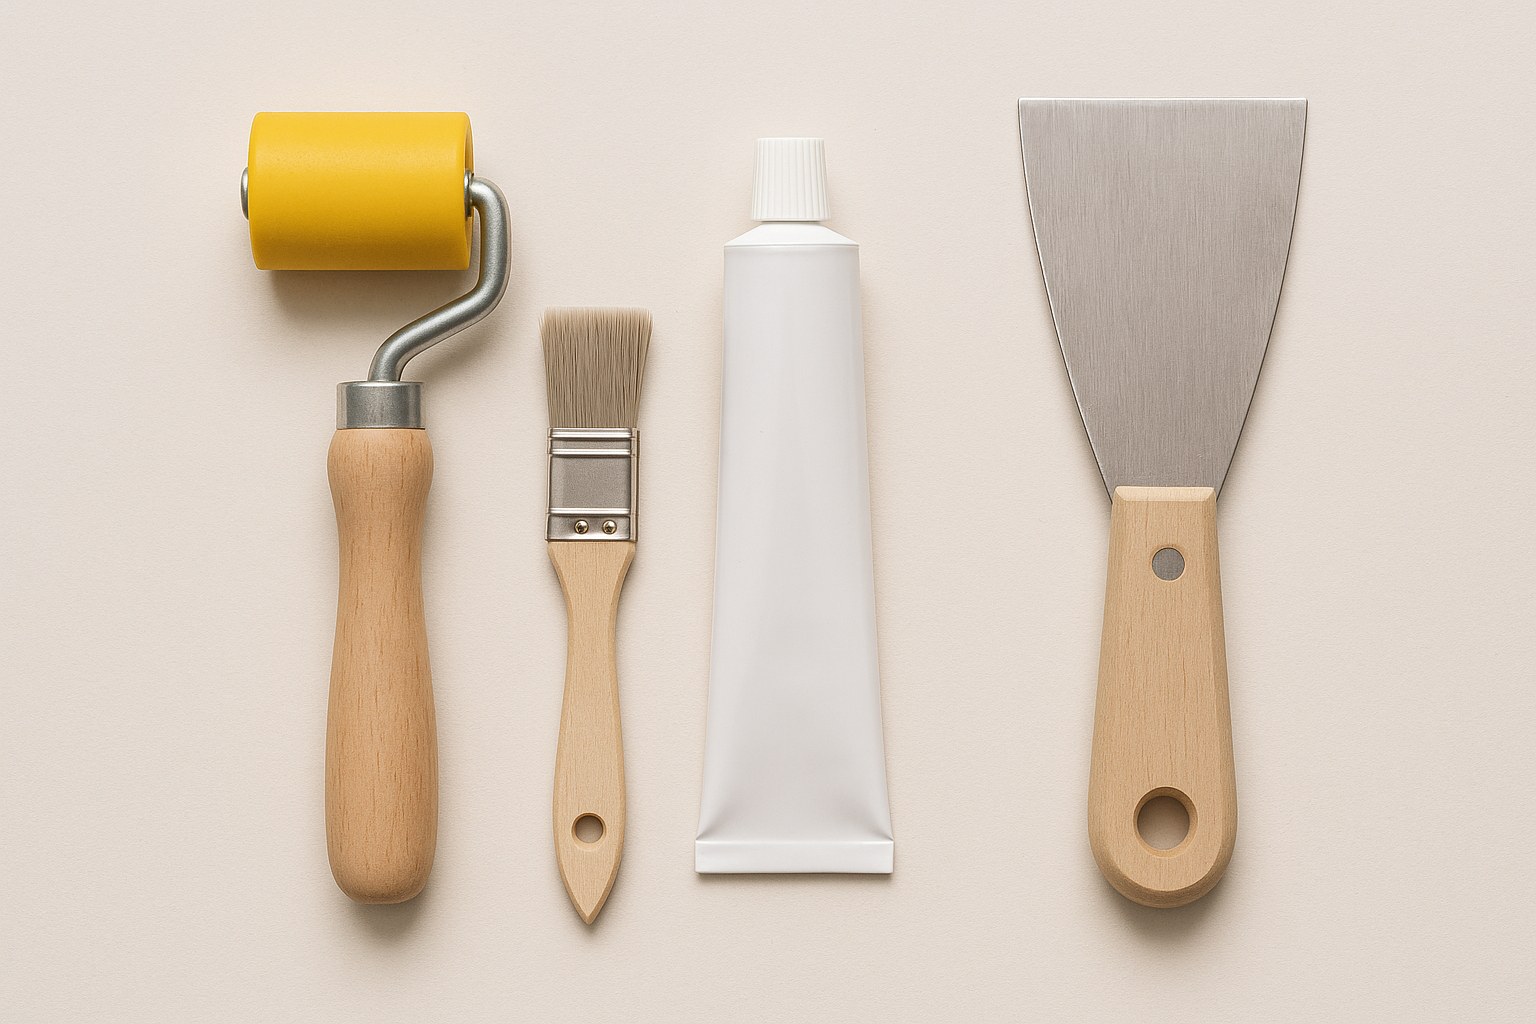
Step 2: Gather Your Wallpaper Repair Toolkit
Ready to tackle that repair? Having the right tools on hand makes the job quick, clean, and effective. You likely have some of these items already, and the rest are easily found at any hardware store.
Here’s your shopping list:
- Wallpaper Seam Adhesive: This is the most important item! Don't just grab any glue. You need an adhesive specifically designed for wallpaper. There are two main types:
- Vinyl Adhesive: For vinyl or fabric-backed wallpapers (which have a slightly plastic feel).
- Border and Seam Repair Adhesive: For traditional paper or non-woven wallpapers.
- Small Paintbrush or Artist's Brush: To apply the adhesive precisely without making a mess.
- Wallpaper Seam Roller: This small, specialized tool is essential for creating a strong, flat bond and squeezing out any air bubbles.
- Putty Knife: Use this to gently lift the wallpaper edge and scrape away any old, flaky adhesive.
- Microfiber Cloth & Towel: For cleaning the wall and wallpaper before you start.
- Damp Sponge: Crucial for wiping away any excess adhesive immediately.
Step 3: The Step-by-Step Repair Process
With your tools ready and the area assessed, it’s time to make the repair. Follow these steps carefully for a seamless finish.
Part 1: Prepare the Surface
Proper prep work is 90% of the job.
- Clean the Area: Gently wipe down the loose wallpaper edge (front and back) and the exposed wall surface with a clean, damp microfiber cloth. This removes any dust or grime that could prevent the new adhesive from bonding.
- Dry Completely: Use a clean towel to thoroughly dry the area. Any lingering moisture will weaken the adhesive.
- Remove Old Debris: Carefully slide your putty knife under the lifted edge. Gently scrape away any old, dried-out glue or debris from both the wall and the back of the wallpaper. Your goal is to create two clean surfaces for the new adhesive to stick to. Be careful not to tear the paper!
Part 2: Apply the Adhesive
- Identify Your Wallpaper Type: If you haven't already, determine your wallpaper material. Rub the surface—if it has a plastic-like, slightly shiny finish, it’s likely vinyl. If it feels like paper, it’s paper or non-woven.
- Apply a Thin Coat: Squeeze a small amount of the appropriate adhesive onto a disposable plate or piece of cardboard. Dip your small paintbrush in and apply a thin, even layer to both the exposed wall and the back of the peeling wallpaper section. Applying it to both surfaces ensures maximum grip. Don’t overdo it—a thick coat will just ooze out and make a mess.
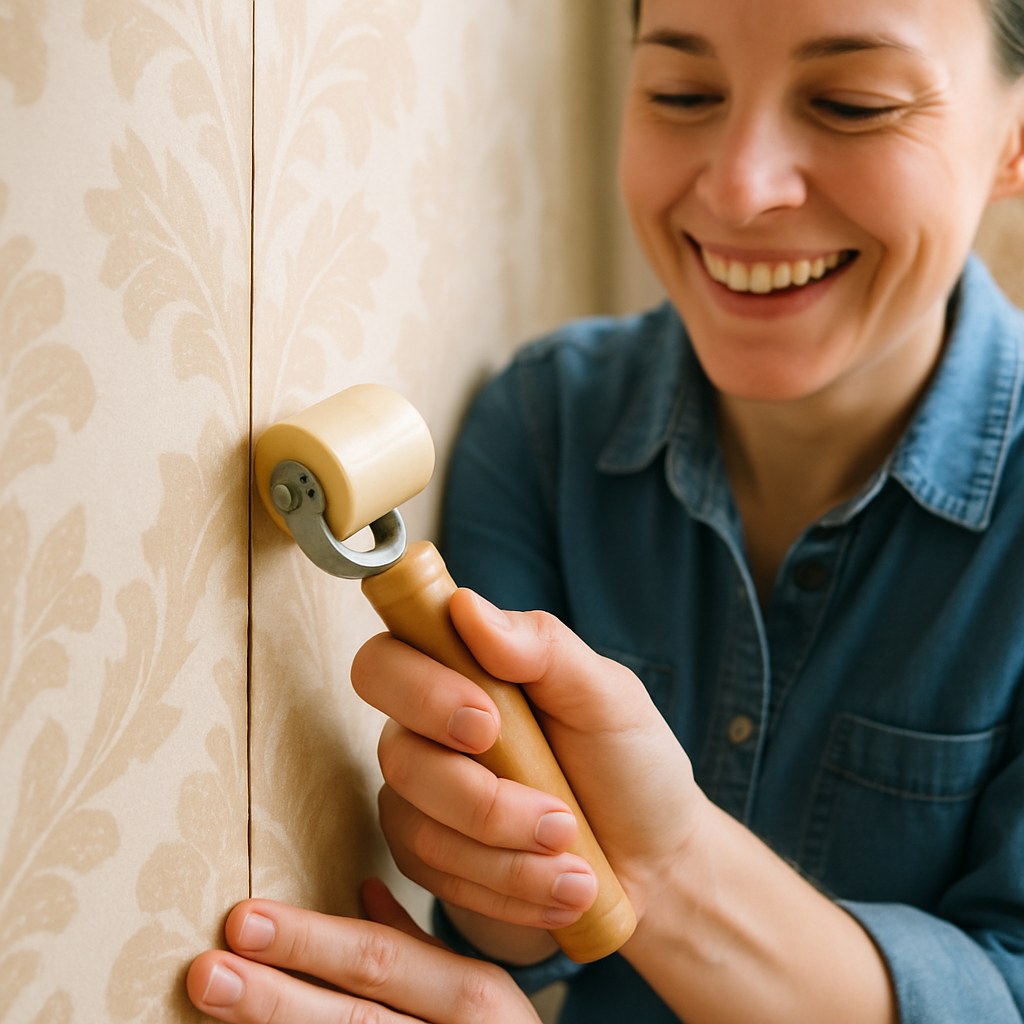
Part 3: Seal the Seam
- Press and Align: Carefully press the glued wallpaper edge back onto the wall. Make sure the pattern is perfectly aligned with the adjoining piece. Use your fingertips to smooth it down, working from the most secure part of the seam out toward the edge.
- Roll It Out: This is where the magic happens. Take your wallpaper seam roller and roll it firmly over the repaired seam. Apply even pressure and roll back and forth a few times. This action bonds the paper to the wall, removes trapped air bubbles, and ensures a flat, invisible finish.
- Clean Up Immediately: No matter how careful you are, a little bit of adhesive will likely squeeze out from the seam. Use your damp sponge to wipe it away immediately. Dried adhesive can leave a shiny, noticeable spot on your wallpaper.
Step 4: The Crucial Drying Period
You’re almost done! But don’t celebrate just yet. How the adhesive dries and cures is critical for a long-lasting repair.
- For High-Humidity Rooms (Bathrooms, Kitchens, etc.): Moisture in the air is your enemy. If you're repairing a seam in a humid room, it’s a great idea to run a dehumidifier in the space for a full 24 hours. This will pull moisture from the air and allow the adhesive to cure properly. After 24 hours, check the seam. If it has lifted again, it may be a sign of a persistent, hidden moisture issue, and it's time to consult a professional.
- For All Other Rooms: In a standard room, the adhesive should set within a couple of hours. After about 2 hours, check your work. The seam should be flat and firmly attached. If it’s lifting, the adhesive may not have bonded correctly, and you may want to seek a professional opinion.
Your Walls Are Back to Beautiful
Fixing a peeling wallpaper seam is a satisfying project that makes a huge visual impact. By following these steps, you can restore the clean, polished look of your room and protect your walls from further damage. It’s a small investment of time that pays off every time you walk into the room and see those perfectly smooth walls.
Feeling proud of your DIY skills? For more home maintenance tips, step-by-step repair guides, and a direct line to trusted professionals for those jobs you’d rather not handle, download the Casa app today. We’re here to make homeownership easier, one project at a time.


