
Jan 6, 2026
How to Fix a Sagging Roof A Homeowners Guide
A sagging roof is a serious warning sign that needs immediate attention. Learn how to safely inspect your roof, identify the common causes of sagging, and understand when it's time to call in a professional to prevent catastrophic failure.
Seeing a dip, curve, or sag in your roofline can be alarming, and for good reason. It’s not just a cosmetic issue; it's a structural red flag indicating that your roof is under stress and may be at risk of failure. A sagging roof can lead to leaks, extensive water damage, and in the worst-case scenario, a partial or total collapse.
Looking for more guidance? Take a look at our Repairs overview.
But don't panic. While this is a serious issue, understanding the potential causes and knowing how to perform a safe initial inspection can empower you to take the right next steps. A small sag might be a straightforward fix, while a larger one will certainly require professional help.
In this guide, we'll walk you through everything you need to know about a sagging roof—from identifying the cause to assessing the severity. Think of us as your expert on the line, helping you figure out what’s going on up there.
Why Is My Roof Sagging? Common Culprits Explained
Before you can address the problem, it helps to understand what’s causing it. A roof is a complex system of beams, joists, and sheathing, and a sag is a symptom of a failure somewhere in that system. Here are the most common causes:
- Excessive Weight: Your roof is only designed to hold a certain amount of weight. Heavy, wet snow is a primary offender. According to FEMA, just one cubic foot of fresh snow can weigh up to 20 pounds, and that weight increases dramatically as it gets wet or turns to ice. Multiple layers of old shingles from past roofing jobs can also add excessive weight.
- Water Damage: This is perhaps the most frequent cause. A persistent leak, however small, can slowly rot the underlying roof sheathing, rafters, or trusses. As the wood softens and weakens, it can no longer support the roof's weight and begins to bow or sag. You might notice a musty smell in your attic or water stains on your ceiling as accompanying symptoms.
- Undersized or Damaged Structural Supports: The home’s original construction could be the problem. If the rafters or trusses are too small, spaced too far apart, or made from inferior materials, they may not be adequate for the roof's span and load. Over time, they can begin to sag under the constant pressure. Similarly, supports that have been cut to install a skylight or vent without proper reinforcement can create a weak spot.
- Age and Wear: Like everything else, roofing materials and the underlying wooden structure degrade over time. An old roof, especially one that is 20 years or older, is simply more susceptible to sagging as the structural components lose their integrity.
How to Inspect a Sagging Roof: A Step-by-Step Guide
Your safety is the number one priority. Under no circumstances should you ever walk on a roof that you suspect is sagging. The structure could be compromised and unable to support your weight. All of these inspection steps can be performed safely from the ground, a ladder, or inside your attic.
Step 1: Perform an Initial Assessment from the Ground
Before getting up close, start by getting a big-picture view.
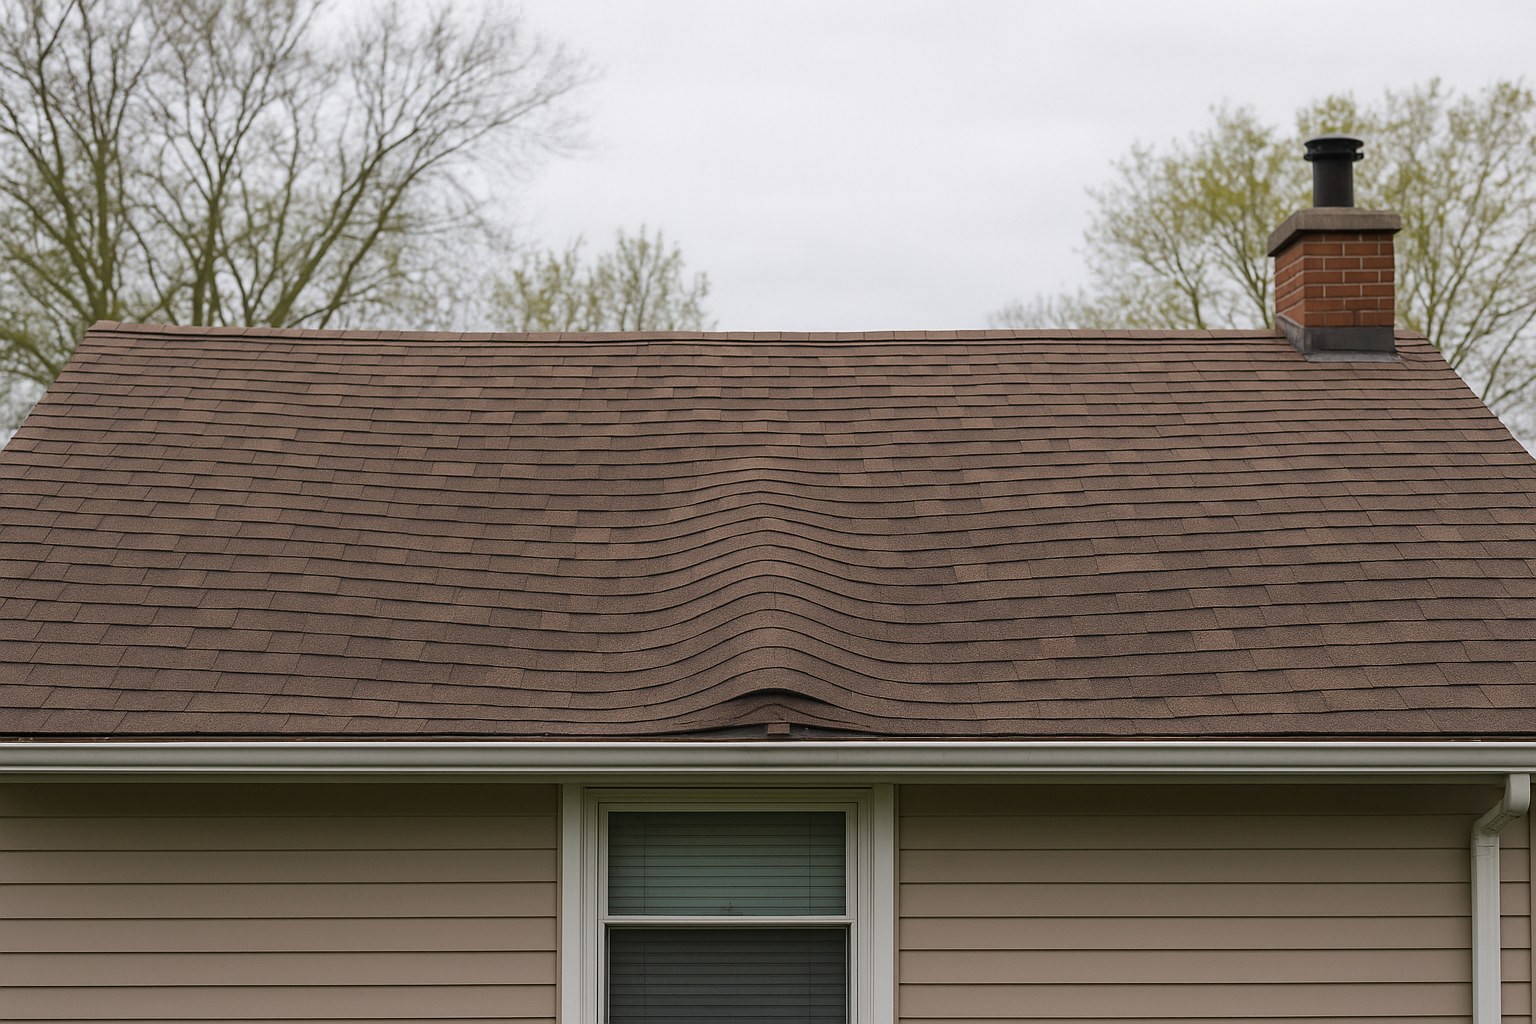
- Check the Ridgeline: Stand back from your home, far enough away that you can see the entire roof. Look at the ridgeline—the peak of the roof. Is it perfectly straight, or does it have a noticeable dip or saddleback in the middle?
- Examine the Planes: Walk around the perimeter of your house and look at the flat planes of the roof. Look for any areas that appear wavy, dished, or sunken in. This can sometimes be easier to spot in the morning or late afternoon when the sun casts long shadows.
If you see a widespread sag across the ridgeline or a very large bowed area, this is a sign of a significant structural problem. Your inspection should stop here, and you should immediately call a licensed roofing contractor or a structural engineer.
If the sag seems confined to a small, specific area, you can proceed to the next step.
Step 2: Inspect the Area from Inside the Attic
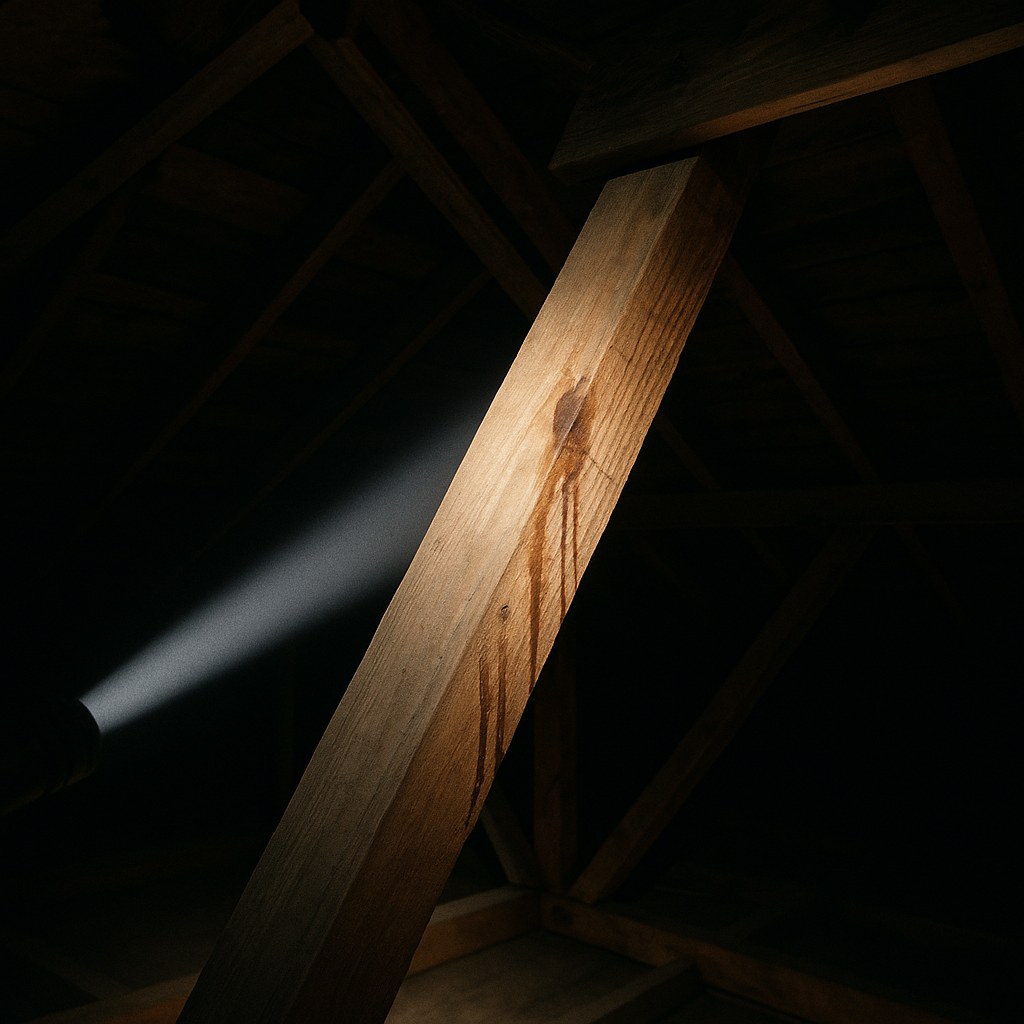
Your attic holds the most important clues. Grab a good flashlight and head up there. Be careful where you step—only walk on the solid joists or trusses, not on the drywall of the ceiling below.
Once you’re in the area directly beneath the sag, look for these signs:
- Broken, Cracked, or Bowed Supports: Shine your flashlight along the rafters (the angled beams) and trusses (the web-like wooden frames). Do you see any that are visibly cracked, splintered, or bent downwards?
- Water Stains or Rot: Look closely at the wood. Do you see dark water stains, black spots that could be mold, or areas where the wood feels soft, damp, or spongy to the touch? Use your nose, too—a musty, damp smell is a sure sign of a long-term moisture problem.
- Daylight: On a bright day, turn off your flashlight. Can you see any slivers of daylight coming through the roof sheathing? This points to holes or gaps that are letting water in.
If you find significant water damage or broken structural supports, the problem is beyond a simple DIY fix. This requires professional expertise to ensure the repair is done safely and correctly.
Step 3: What to Do About a Localized Sag
If the sag is small and you haven't found any broken rafters or signs of major water damage from the attic, the issue might be less severe. It could be related to the roof sheathing (the plywood layer under the shingles) or an external factor like snow load.
If there's no snow and no visible water damage, but the sheathing feels soft or bouncy when you press on it from the attic, it's likely weakened and needs replacement. This is a job best left for a professional roofer.
However, if you have a significant amount of snow on your roof, that could be the entire problem.
The One DIY Fix to Consider: Safely Removing Snow
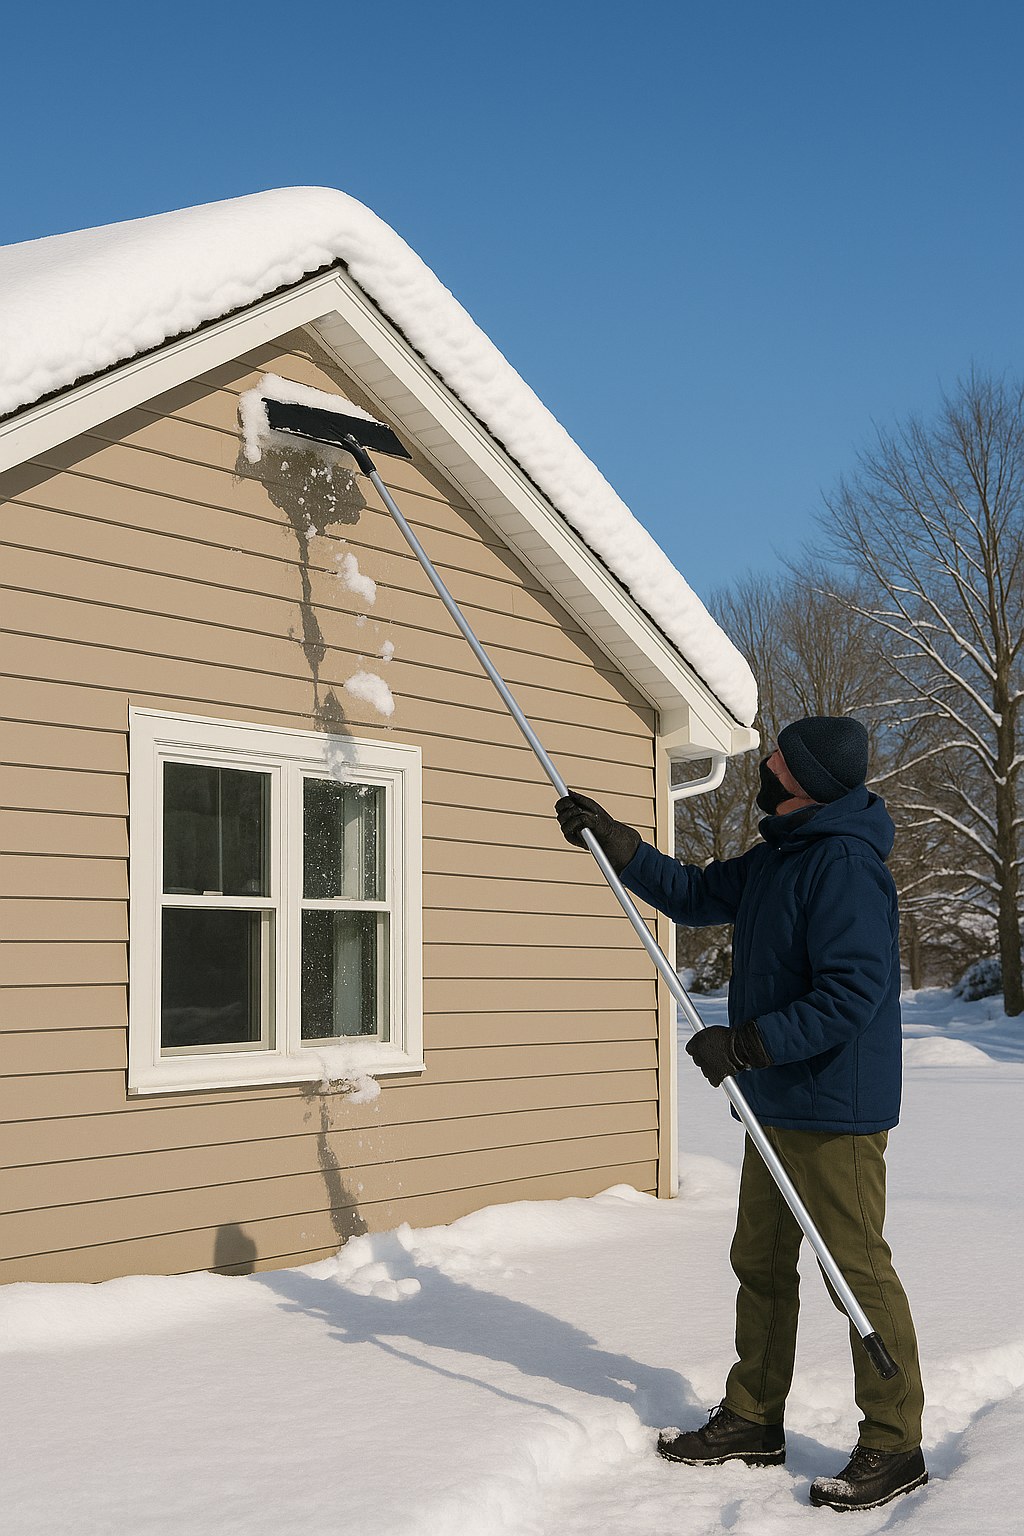
If your roof is sagging under a heavy blanket of snow (generally more than 6 inches), carefully removing that weight may solve the problem. The key word here is safely.
- Use the Right Tool: You need a proper roof rake, which is designed for this purpose. They have a long, extendable handle that allows you to work from the ground. Never use a metal shovel or a sharp tool that could damage your shingles.
- Stay on the Ground: Do not use a ladder to get a better angle. Working from a ladder is unstable and greatly increases your risk of falling, especially in icy conditions.
- Pull, Don't Push: Always stand away from the edge of the roof and gently pull the snow down towards you. Pushing snow upward can lift and damage your shingles.
- Work Evenly: Remove snow in a uniform way across the roof edge. Clearing one large section completely can create an unbalanced load, which can put even more stress on the structure. Just clear the first 3-4 feet from the eaves to relieve the most immediate pressure.
After you’ve removed a significant amount of snow, step back and look at the sag again. If it has noticeably improved or disappeared, you've likely found the culprit. However, if the sag remains, the snow load may have caused permanent structural damage that needs to be assessed by a professional.
When You Absolutely Must Call a Professional
To recap, a sagging roof is not a DIY project. Your inspection is about diagnosis, not repair. It's time to call a licensed roofing contractor immediately if you encounter any of the following:
- The sag is widespread or affects the main ridgeline.
- You see cracked, broken, or cut rafters or trusses in the attic.
- There are significant signs of water damage, rot, or mold.
- The sag does not improve after removing heavy snow.
A professional can properly diagnose the root cause, determine the extent of the damage, and propose a safe and effective solution, which could range from sistering new rafters alongside the old ones to a full replacement of the compromised section. The cost to repair a sagging roof can range from $1,000 to over $10,000, depending on the cause and complexity of the fix. Getting a professional assessment is the only way to know for sure.
Don’t Wait—Take Action Today
A sagging roof is your home's cry for help. Ignoring it can turn a manageable repair into a catastrophic and incredibly expensive failure. By following these safe inspection steps, you can quickly determine the severity of the issue and make an informed decision.
For guidance on this and any other home maintenance challenge, download the Casa app. Our platform provides easy-to-follow guides for tasks you can handle yourself and connects you with a network of vetted, trusted professionals for the jobs you can't. Take the guesswork out of homeownership and let Casa help you protect your biggest investment.