Mortar is actually designed to be the sacrificial part of a masonry wall. It's softer than the brick or stone, so it absorbs the stress of expansion, contraction, and moisture over the years. Eventually, it breaks down so the harder, more expensive bricks or stones don't.
The key is to determine whether you’re looking at normal aging, which you can often repair yourself, or a sign of a more significant problem that needs a professional eye. This guide will walk you through how to inspect your foundation, understand what you’re seeing, and decide on the right course of action.
Is It a Structural Problem?
Before you pick up any tools, your first step is to perform a careful inspection to rule out serious structural issues. Some symptoms look like simple mortar decay but can point to deeper problems with how your foundation is bearing the weight of your home.
Stop and call a structural engineer immediately if you see:
- Wide, systematic cracks: Look for stair-step cracks in brick or block walls that are wider than a pencil, or long horizontal cracks.
- Bowing or bulging walls: Foundation walls should be flat and plumb. Any noticeable curve inward or outward is a red flag.
- Uneven settling: Signs of this inside the home include sloping floors, doors that no longer close properly, and cracks appearing in drywall above windows and doors.
If you see any of these signs, the crumbling mortar is a symptom, not the root cause. A professional evaluation is necessary to ensure the stability of your home.
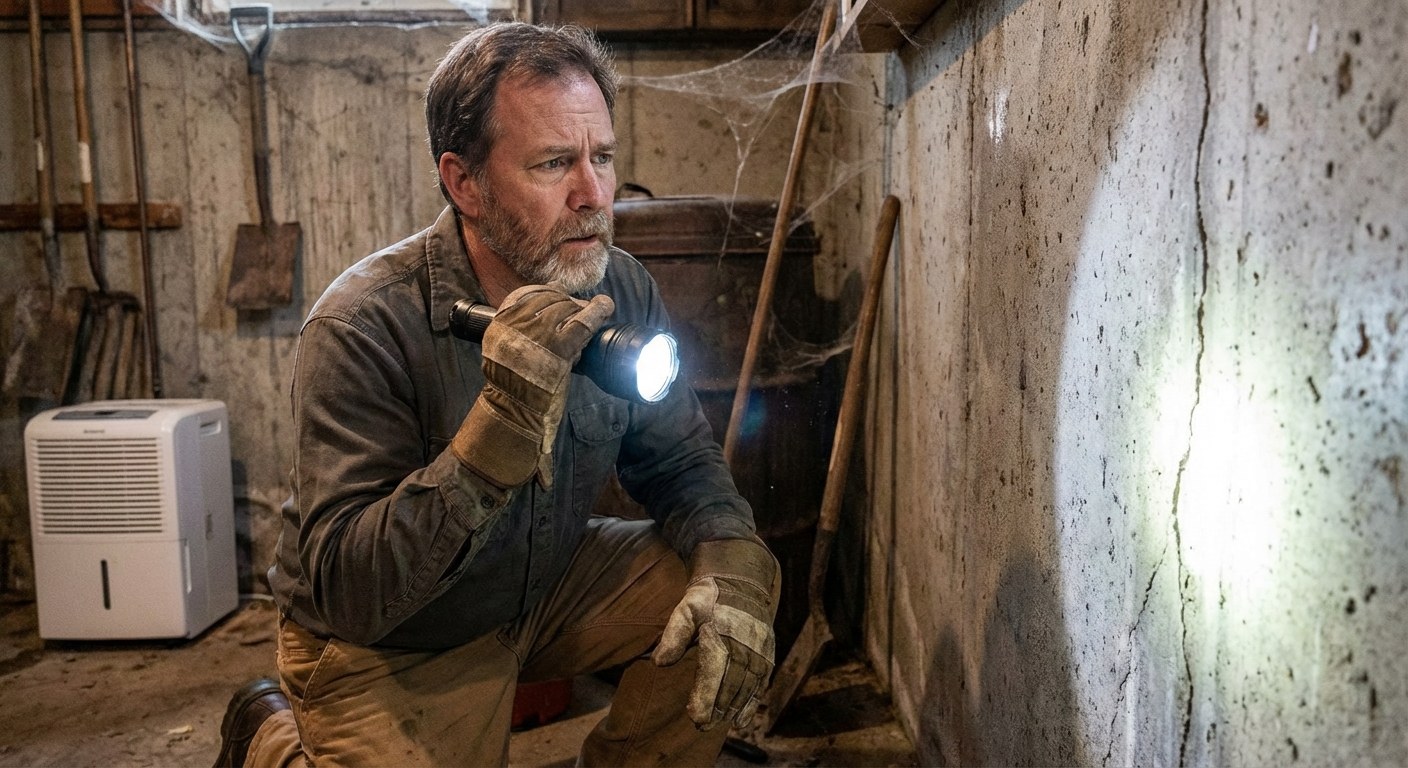
Step 1: Inspect the Mortar
If you don't see any of the alarming signs above, you can proceed with a closer inspection of the mortar itself. This will help you determine the scope of the repair.
What you’ll need:
- Safety glasses
- Work gloves
- A good flashlight
- A flathead screwdriver or masonry chisel
Walk the entire perimeter of your foundation, shining the flashlight along the walls. Look for areas where the mortar is visibly receding, cracked, or missing.
Gently scrape a few of the affected mortar joints (the spaces between the bricks or stones) with your screwdriver. If the mortar flakes away easily or feels sandy and soft, it’s ready for repair. As you inspect, take clear photos of the damaged areas. Keeping a visual record in an app like Casa can help you track the condition of your foundation over time.
Step 2: Decide to Patch or Repoint
Based on your inspection, you'll know if you're dealing with a few small problem spots or a more widespread issue. This distinction determines your next steps.
Patching is a good option when:
- The crumbling is limited to a few isolated joints.
- The total area of damage is less than a few square feet.
- This is a manageable DIY project for a homeowner comfortable with basic tool use.
Repointing is necessary when:
- The mortar is failing across a large section of a wall (for example, a 3 ft x 3 ft area or larger).
- You see long, continuous rows of crumbling horizontal or vertical joints.
- Repointing—the process of systematically removing all the old mortar from the joints and replacing it—is a much larger project. While it can be a DIY task for a skilled and patient homeowner, many people choose to hire a masonry contractor for this work to ensure it’s done correctly and efficiently.
How to Patch Mortar Joints
For isolated repairs, patching is a straightforward process. The most critical part is using the right type of mortar. Using a mortar mix that is harder than your original bricks can cause the bricks themselves to crack over time.
- For most modern brick or CMU (concrete block) foundations: Use a Type N premixed mortar.
- For stone foundations or very old, soft brick: Use a Type S premixed mortar. It offers the higher bond strength needed for irregular stone.
Tools for Patching:
- Small bucket for mixing
- Pointing trowel
- Stiff brush
- Hammer and cold chisel
- Spray bottle with water
Steps for a Patch Repair:
- Clean the Joint: Use the hammer and chisel to carefully chip away the loose, crumbling mortar. You want to remove material to a uniform depth of about 1/2 to 3/4 of an inch. Use the stiff brush to sweep out all remaining dust and debris.
- Dampen the Area: Lightly mist the cleaned-out joint and the surrounding bricks or stones with water from the spray bottle. This prevents the porous masonry from pulling water out of the new mortar too quickly, which ensures a stronger bond.
- Mix and Apply Mortar: Mix a small batch of the appropriate mortar with water until it reaches a peanut-butter-like consistency. Load some mortar onto your pointing trowel and press it firmly into the joint. Pack it in tightly, ensuring there are no air pockets.
- Finish the Joint: Once the mortar is thumb-print hard (it holds an impression but doesn’t stick to your finger), use a jointing tool or the edge of your trowel to "strike" the joint. This compacts the surface and shapes it to match the look of your other mortar joints.
- Cure Slowly: For the next 24-48 hours, lightly mist the patch with water a few times a day. Slow curing is essential for the mortar to reach its maximum strength.
When to Hire a Professional for Repointing
If your inspection revealed widespread deterioration, repointing the entire section is the correct long-term solution. This is a significantly larger undertaking. A professional mason has the experience to:
- Quickly and safely remove large amounts of old mortar.
- Accurately match the color and composition of your existing mortar.
- Work efficiently to complete the job in a timely manner.
- Create clean, uniform joints for a professional finish that protects your home.
Typical Time and Costs
- DIY Mortar Patching: This is a very cost-effective repair. Expect to spend under $50 on a bag of mortar mix and a few basic tools. The work itself should only take an hour or two, plus curing time.
- Professional Repointing: Costs for repointing can vary widely based on your location, the type of masonry, and the condition of the wall. Masons typically charge per square foot. You can expect a range of $5 to $25 per square foot.
- Structural Engineer Consultation: If you found signs of a serious structural issue, a consultation typically costs between $300 and $1,000. This fee gets you a definitive assessment of your home's stability and a clear plan for any necessary repairs.
A Foundation of Confidence
Seeing your foundation’s mortar begin to crumble is a normal part of your home’s lifecycle. By calmly inspecting the situation, you can distinguish between routine upkeep and a genuine cause for concern. A small patch job is a great way to build your DIY skills, while knowing when to call a professional for a larger repointing project is just as important.
Staying on top of your home’s needs is the best way to prevent small issues from becoming big problems. Download the Casa app today to keep track of your home’s maintenance schedule, store important notes and photos, and feel prepared for whatever your home needs next.
Related Reading


