Falling branches are a significant cause of property damage and personal injury in the United States. According to the Tree Care Industry Association, issues related to falling trees or branches can cause damage costing homeowners thousands of dollars to repair. More importantly, they pose a serious safety risk to you, your family, and anyone visiting your property.
But don't worry, we're here to walk you through it. As your friendly home maintenance experts, we’ll help you assess the situation, determine what you can safely handle yourself, and know exactly when it’s time to call in a professional. Let's get that tree healthy and your yard safe again.
First, How to Tell if a Tree Limb is Dead or Diseased
Before you grab your tools, you need to be sure you’re looking at a problem branch. Sometimes a branch can lose its leaves late in the season and still be healthy. Here’s what to look for:
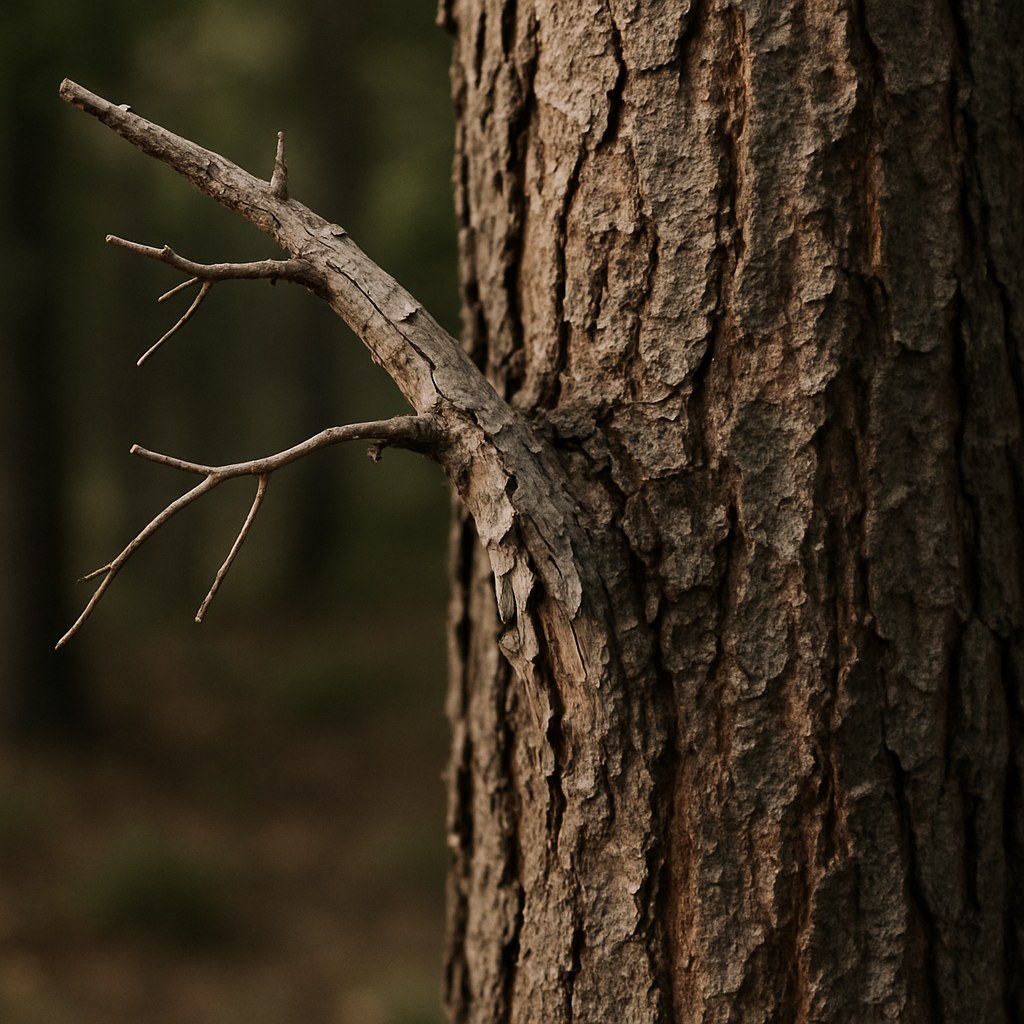
- No Leaves or Buds: In the spring or summer, a dead branch will have no leaves, or the leaves will be brown and withered while the rest of the tree is green. In winter, check for a lack of healthy buds compared to other branches.
- Brittle and Snaps Easily: Try bending a small twig on the branch. A living branch will be flexible, while a dead one will be brittle and snap off cleanly.
- Peeling Bark: As a branch dies, the bark will often become loose and start to peel away from the wood.
- Signs of Fungus or Decay: Look for mushrooms growing on the branch or at its base. This is a strong indicator of internal rot.
- Oozing Sap or Cankers: While some sap is normal, unusual oozing, especially from discolored or sunken areas of bark (cankers), can signal disease.
- Cracks in the Trunk: Deep cracks in the trunk, particularly where the problem limb connects, can suggest a larger structural issue with the tree.
Step 1: The All-Important Safety and Site Inspection
Before a single cut is made, safety must be your top priority. Tree work can be dangerous, and a proper assessment will tell you if this is a DIY job or one for the pros.
What you’ll need:
Here’s what to do:
- Get a Full View: Stand back from the tree and observe it from at least three different angles. This will give you a complete picture of its condition and the location of the problem limbs.
- Identify the Problem Limbs: Pinpoint every dead or diseased branch you can see. Take note of how thick they are and how high up they are in the tree.
- Scan for Hazards: Carefully look for any potential targets below or near the branches. This includes power lines, your house, your garage, sheds, walkways, patios, or any areas where people or pets gather.
Now, ask yourself this critical question: Are any of the dead or diseased limbs within 10 feet of a power line, directly over a structure, or hanging above a high-traffic area?
If you answered YES, stop right here. This is not a DIY job. Working near power lines can be fatal, and removing heavy branches over a structure requires specialized equipment, training, and insurance. It's time to call a certified arborist.
If you answered NO, you can proceed to the next assessment step.
Step 2: Can I Prune This Myself? A Quick Assessment
Just because a branch isn't near a power line doesn't automatically make it a DIY project. The size and location of the limb are the next deciding factors.
-
Question 1: Are most of the affected limbs less than 1 inch thick and easily reachable from the ground?
If yes, great! This is something you can likely handle with a pair of hand pruners. Proceed to the "How to Prune Small Limbs" section below.
-
Question 2: If not, are any of the affected limbs between 1 and 3 inches thick and reachable from the ground without climbing on anything?
If yes, you can probably tackle this with a pruning saw. Proceed to the "How to Prune Medium Limbs" section.
If the limbs are thicker than 3 inches or require a ladder to reach, you should call a certified arborist. Using a saw on a ladder is extremely dangerous without proper training and safety equipment. Large limbs are incredibly heavy and can behave unpredictably when cut, creating a significant risk of injury.
Step 3: How to Prune Small Limbs (Under 1 Inch)
For small, easily accessible dead branches, a clean cut is all you need to help your tree heal and look its best.
Tools needed:
- Safety glasses
- Hand pruners
- Rubbing alcohol and a rag
Instructions:
- Disinfect Your Pruners: Before you start, wipe the blades of your hand pruners with rubbing alcohol. This prevents the transfer of any potential diseases from one plant (or one cut) to another.
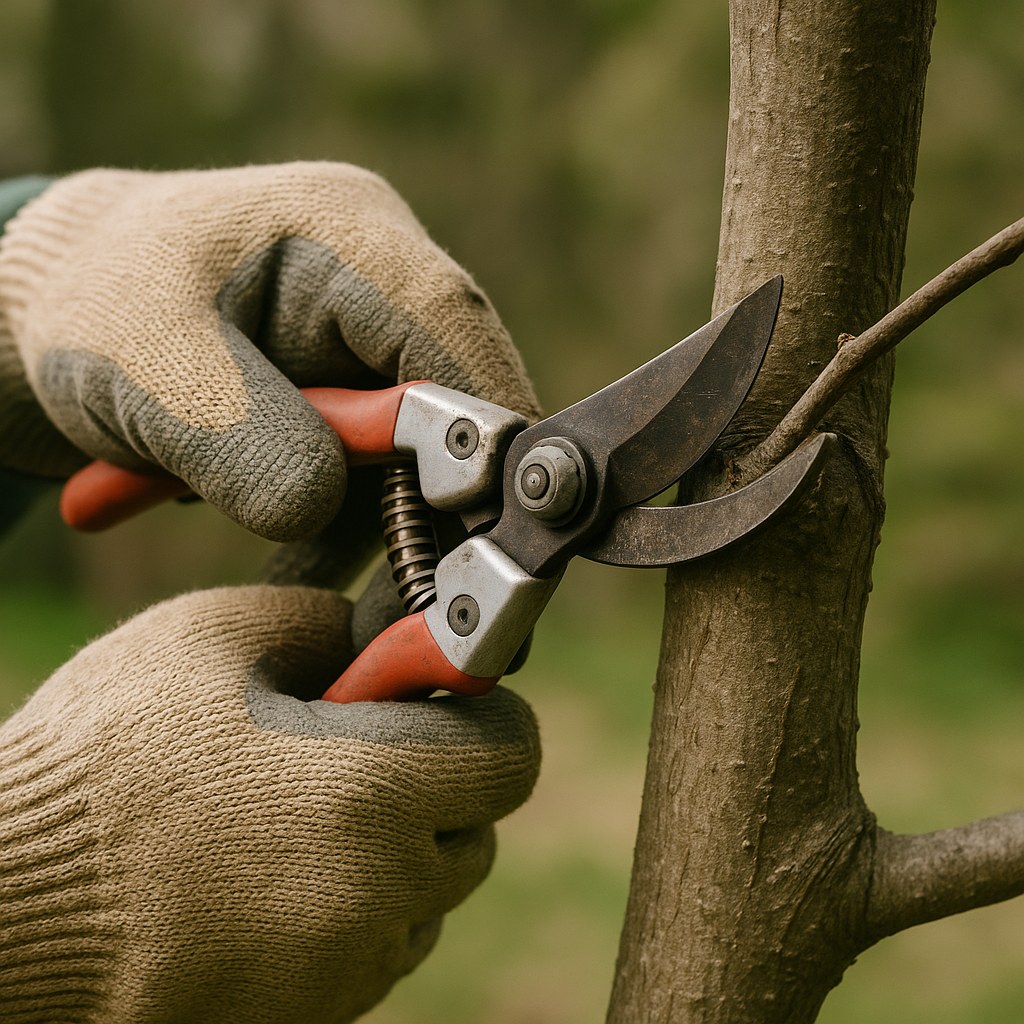
- Locate the Branch Collar: Look at where the dead limb meets the larger parent branch or the trunk. You should see a slightly swollen, wrinkled-looking area. This is the branch collar. It contains specialized cells that will seal over the wound after you make the cut. It is crucial not to damage this collar.
- Position Your Pruners: Place the blades of your pruners just outside the branch collar. You want to cut the branch off, not the collar itself.
- Make a Clean Cut: Squeeze the pruners firmly to make one smooth, clean cut. Avoid twisting or tearing the branch.
- Inspect the Cut: Look at the surface you just cut. Healthy wood will appear light and uniform in color. If you see dark discoloration or signs of rot, inspect the rest of the tree for more widespread issues.
After you’ve removed the small limbs, take another look at the tree. Do you see other dead limbs higher up, or major signs of decay on the trunk like mushrooms or large cracks? If so, the problem might be more serious than just a few dead twigs. It’s best to get a professional opinion from an arborist.
Step 4: How to Prune Medium Limbs (1–3 Inches)
Removing slightly larger branches requires a pruning saw and a specific technique called the "three-cut method." This method prevents the weight of the branch from tearing a strip of bark off the trunk as it falls, which would create a large, damaging wound.
Tools needed:
- Safety glasses
- Work gloves
- Pruning saw
- Rubbing alcohol and a rag
Instructions:
- Disinfect Your Saw: Just like with the pruners, clean your saw blade with rubbing alcohol.
- The First Cut (Undercut): Go about 6-12 inches out from the branch collar, on the underside of the limb. Saw upward about a third of the way through the branch. This is your "notch cut" and will prevent the bark from tearing.
- The Second Cut (Relief Cut): Move about 2 inches farther out from your first cut (away from the trunk). From the top of the branch, saw all the way through. The weight of the limb will cause it to break away cleanly between the two cuts.
- The Third Cut (Final Cut): You are now left with a small stub. Make your final cut to remove this stub. Place your saw just outside the branch collar and saw through, angling slightly down and away from the trunk. This leaves the collar intact to heal over the wound.
- Inspect the Wound: Examine the final cut surface. Does it show dark discoloration, softness, or rot that extends more than a quarter-inch deep into the wood? If so, this could indicate that decay has spread into the main trunk of the tree. This is a serious sign, and you should have an arborist inspect the tree’s structural integrity.
Know When to Call a Pro
To recap, it's time to put down the tools and pick up the phone to call a certified arborist if you encounter any of the following:
- Branches are near power lines or overhanging structures.
- Branches are more than 3 inches in diameter.
- You need a ladder to reach the limb.
- You see signs of widespread decay, like mushrooms or large trunk cracks.
- You're simply not comfortable or confident performing the work.
Hiring a certified arborist isn't just about getting the job done; it's an investment in your safety and your property's value. A consultation might cost between $75 and $150, while specific pruning jobs can range from a few hundred to over a thousand dollars depending on the complexity. These professionals are trained in safe removal techniques, are fully insured, and can diagnose underlying health issues you might miss.
Keep Your Home in Top Shape with Casa
Taking care of your trees is a vital part of home maintenance, but it’s just one piece of the puzzle. From seasonal check-ups to unexpected repairs, managing a home can feel overwhelming.
That’s where the Casa app comes in. We’ve designed it to be your go-to partner for all things home maintenance. You can follow our easy step-by-step DIY guides (like this one!), set reminders for important tasks, and when a job is too big to handle, Casa can connect you with trusted, certified professionals in your area.
Download the Casa app today and take the guesswork out of homeownership. Your home—and your trees—will thank you.


