This guide will walk you through the process, whether you're replacing an old, non-working fixture or simply installing a new one in its place. We'll cover the essential safety checks, the removal of the old light, and the installation of the new one, step by step.
Is This a DIY Project for You?
Before you begin, it’s important to understand the scope of the project. This guide is for replacing an existing light fixture where a properly installed electrical box (also called a junction box, this is the metal or plastic container that houses the wiring in the ceiling or wall) and a wall switch are already in place.
If your project involves running new wiring or installing an electrical box where there isn't one, that is a job for a licensed electrician.
Tools and Materials You'll Need
Gathering your tools beforehand makes the process go smoothly. You will likely need:
- The new light fixture and its parts
- A sturdy stepladder
- A non-contact voltage tester
- Phillips head screwdriver
- Wire connectors (often included with the new fixture)
- Silicone caulk (for outdoor fixture installations)
Step 1: Shut Off the Power
This is the most critical step. Never work on electrical wiring without confirming the power is completely off.
- Locate your electrical panel (also called a circuit breaker box).
- Find the breaker that controls the power to the room where you’ll be working and flip it to the “OFF” position. You might need to test a few if your panel isn't clearly labeled.
- Confirm the power is off. Go to the wall switch for the light fixture and flip it on. The light should not turn on.
- Use a non-contact voltage tester. This is a small, pen-like tool that can detect electricity without touching bare wires. If you're removing an old fixture, hold the tester near the fixture itself. If you're working with an empty electrical box, touch the tester to the wires inside. The tester should not light up or beep. If it does, go back to the breaker box and find the correct circuit.
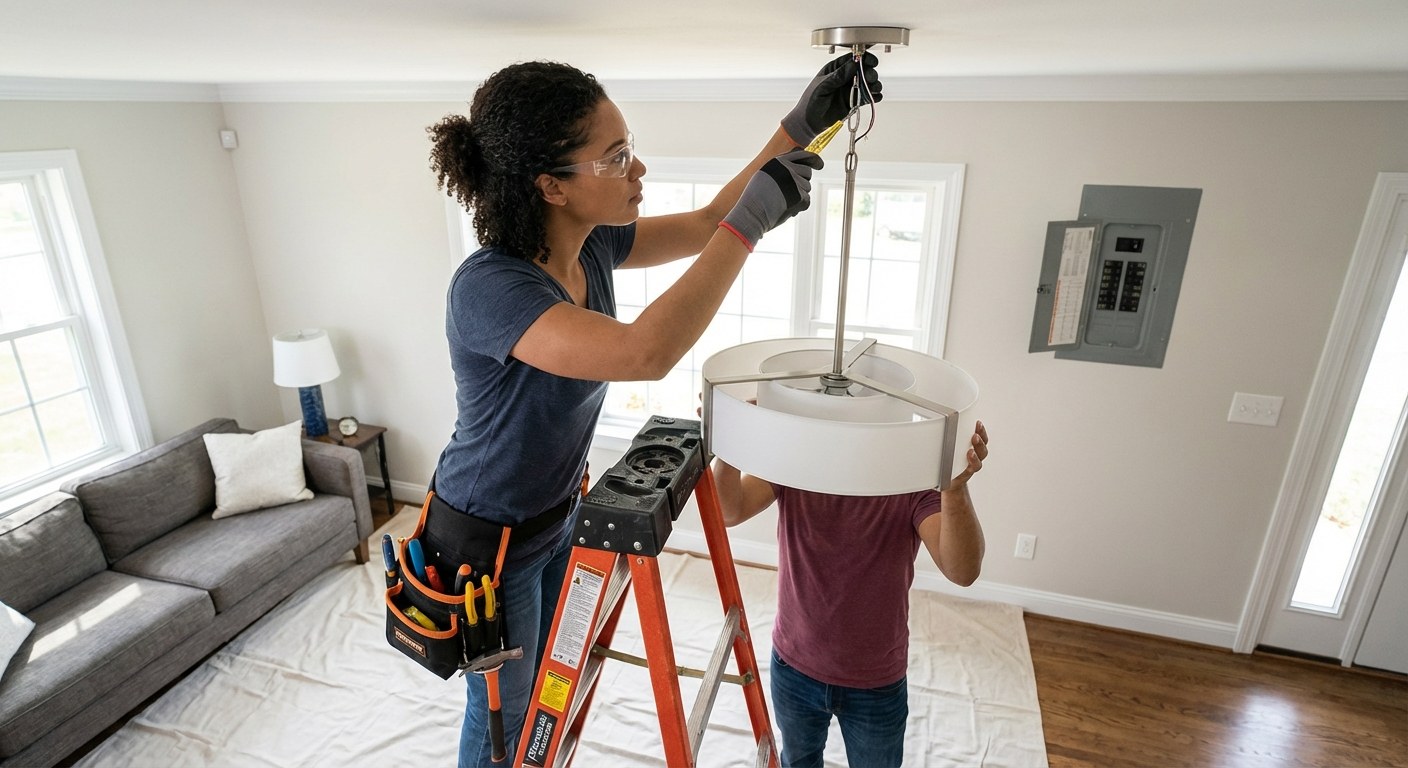
Step 2: Remove the Old Fixture (If Replacing)
If you have an existing fixture, you'll need to remove it first. If you're starting with an empty electrical box covered by a blank plate, you can skip to Step 3.
- Set up your stepladder on a stable, level surface.
- Remove any light bulbs or glass shades from the old fixture to prevent breakage and make it lighter.
- Loosen the canopy screws. The canopy is the decorative plate that sits flush against the ceiling or wall. As you loosen it, support the fixture with one hand so it doesn’t fall.
- Expose the wiring. Carefully lower the canopy to reveal the electrical box and the connected wires.
- Double-check for power. Before touching any wires, use your non-contact voltage tester one more time on the wires and connectors to be certain the power is off.
- Disconnect the wires. The wires from the fixture are connected to the wires from the ceiling with small plastic caps called wire connectors or wire nuts. To remove them, twist them counter-clockwise until they come off.
- Remove the fixture. With the wires disconnected, unscrew the mounting bracket that holds the fixture to the electrical box. Carefully take the old fixture down and set it aside.
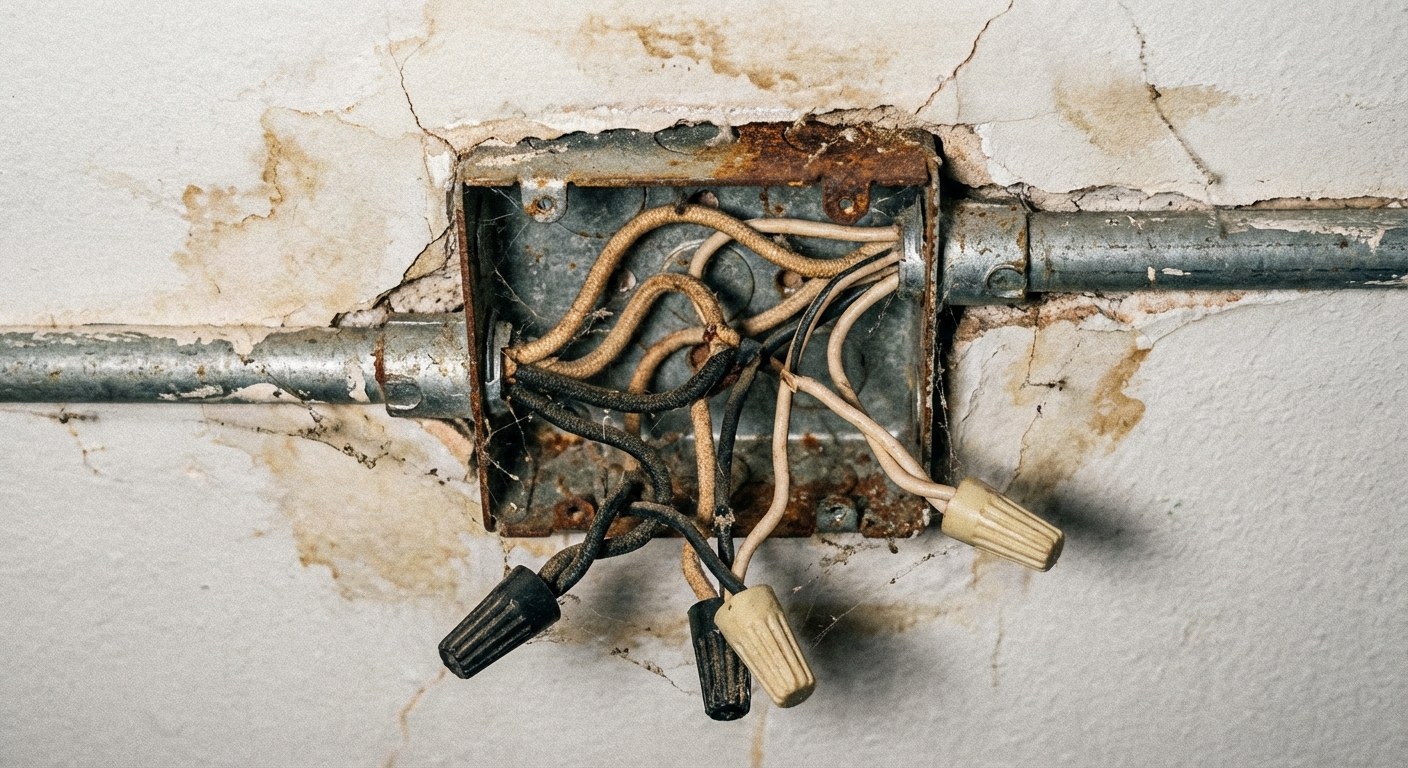
When to Stop: Check the Electrical Box
With the old fixture removed, take a moment to inspect the electrical box.
- Is it secure? Gently try to wiggle the box. It should be firmly attached to a ceiling joist or a support brace and should not move.
- Is it rated for your new fixture? Look for a stamp inside the box that indicates its weight rating (e.g., "Fixture Support 50 LBS"). If your new fixture is heavier than the box's rating, or if the box is loose, you should stop.
An unsecured or underrated box cannot safely support the weight of a new fixture and could lead to it falling. In this situation, it's time to call a licensed electrician or a carpenter to reinforce or replace the box before you proceed.
Step 3: Install the New Light Fixture
Now you're ready to install your new light.
- Install the mounting bracket. Your new fixture will come with a mounting bracket or strap. Secure this to the electrical box using the screws provided. Make sure it's snug and doesn't wiggle.
- Connect the wires. This is the part that often feels most confusing, but it’s usually straightforward. You will typically see three types of wires:
- Ground: A bare copper or green-coated wire. Connect the ground wire from your fixture to the ground wire from the electrical box, or to the green grounding screw on the mounting bracket.
- Neutral: A white-coated wire. Using a wire connector, twist the white wire from the fixture together with the white wire from the box.
- Hot: A black-coated wire. Using a wire connector, twist the black wire from the fixture together with the black wire from the box.
- Check your connections. Give each wire connector a gentle tug to ensure the wires are held tightly.
- Tuck the wires. Carefully push all the connected wires up into the electrical box, making sure none are pinched.
- Secure the canopy. Lift the new fixture’s canopy up to the ceiling so it's flush, and secure it to the mounting bracket with the provided canopy screws.
- Install bulbs and shades. Screw in the recommended light bulbs and attach any globes or shades that came with the fixture.
Step 4: Restore Power and Test Your Work
Head back to the electrical panel and flip the circuit breaker back to the “ON” position. Then, go to the wall switch and turn on your new light.
If it works correctly, you're all done!
If the light doesn't turn on, or if the breaker trips immediately, turn the power back off at the panel. Double-check your wire connections. If you've checked your work and it still isn't functioning, there may be a larger wiring issue that needs a professional eye. This is the right time to call a licensed electrician.
Time and Cost to Install a Light Fixture
- Time: For a simple replacement, you can expect the project to take 30 to 60 minutes.
- DIY Cost: Your only cost is the new fixture itself, plus around $15–$25 for a non-contact voltage tester if you don't already own one.
- Professional Cost: Hiring an electrician for a standard fixture replacement typically costs between $100 and $300, depending on your location and the complexity of the job. Costs will be higher if new wiring or a new electrical box is needed.
A Simple Update with a Big Impact
Replacing a light fixture is a satisfying project that can significantly improve a room. The key is to work slowly, prioritize safety by always turning off the power, and know when a situation calls for a professional. Keeping track of tasks like these, and knowing who to call when you need help, is easier with a home advisor like Casa.
Ready to take control of your home maintenance? Download the Casa app today. It’s a simple way to track projects, get clear advice, and connect with trusted professionals for the jobs you’d rather leave to an expert.


