Seeing a panel of siding flapping in the wind or pulling away from your house can be alarming. It’s easy to jump to the worst-case scenario—thinking your walls are rotting or the structure is failing.
Looking for more guidance? Take a look at our Repairs overview.
Get the Casa App
Identify and resolve the issue to prevent future problems.
Take a deep breath. In most cases, loose siding is a minor maintenance issue, not a structural disaster. Siding panels endure intense heat, freezing cold, and strong winds, all of which cause materials to expand, contract, and occasionally wiggle free from their fasteners.
The good news is that re-securing a loose panel is often a straightforward afternoon project. Whether you have vinyl, wood, or fiber cement siding, this guide will help you assess the situation and get that panel back in place before moisture has a chance to sneak in.
Why Is My Siding Loose?
Before grabbing a hammer, it helps to know what likely caused the issue so you can prevent it from happening again.
Thermal Expansion: Vinyl siding, in particular, moves quite a bit. If it was nailed too tightly during installation, it might buckle or pop off when the temperature swings.
Wind Damage: Sustained high winds can work fasteners loose over time.
Rot or Rust: For wood siding, the wood around the nail hole may have softened. For other types, the nails themselves might have rusted away.
Settling: Minor house settling can sometimes shift panels enough to create gaps.
Safety First
Since you’ll likely be working on a ladder or handling materials that can splinter or snap, safety is key.
Gloves: Essential for handling sharp metal edges or splintery wood.
Eye Protection: Nails can snap, and old paint can chip.
Ladder Safety: If the loose panel is high up, ensure your ladder is on stable ground. If you aren't comfortable with heights, this is the point where you should call a pro.
Step 1: Diagnose the Material and the Damage
Estimated Time: 10-15 minutes
Tools Needed: Work gloves, safety glasses.
First, you need to identify exactly what you are working with. Different materials require different fastening techniques.
Gently tug the panel. Don't yank it. You just want to see how much it moves and where the connection failed.
Check the fasteners. Are the nail heads missing? Are they rusted? Or did the siding tear around the nail?
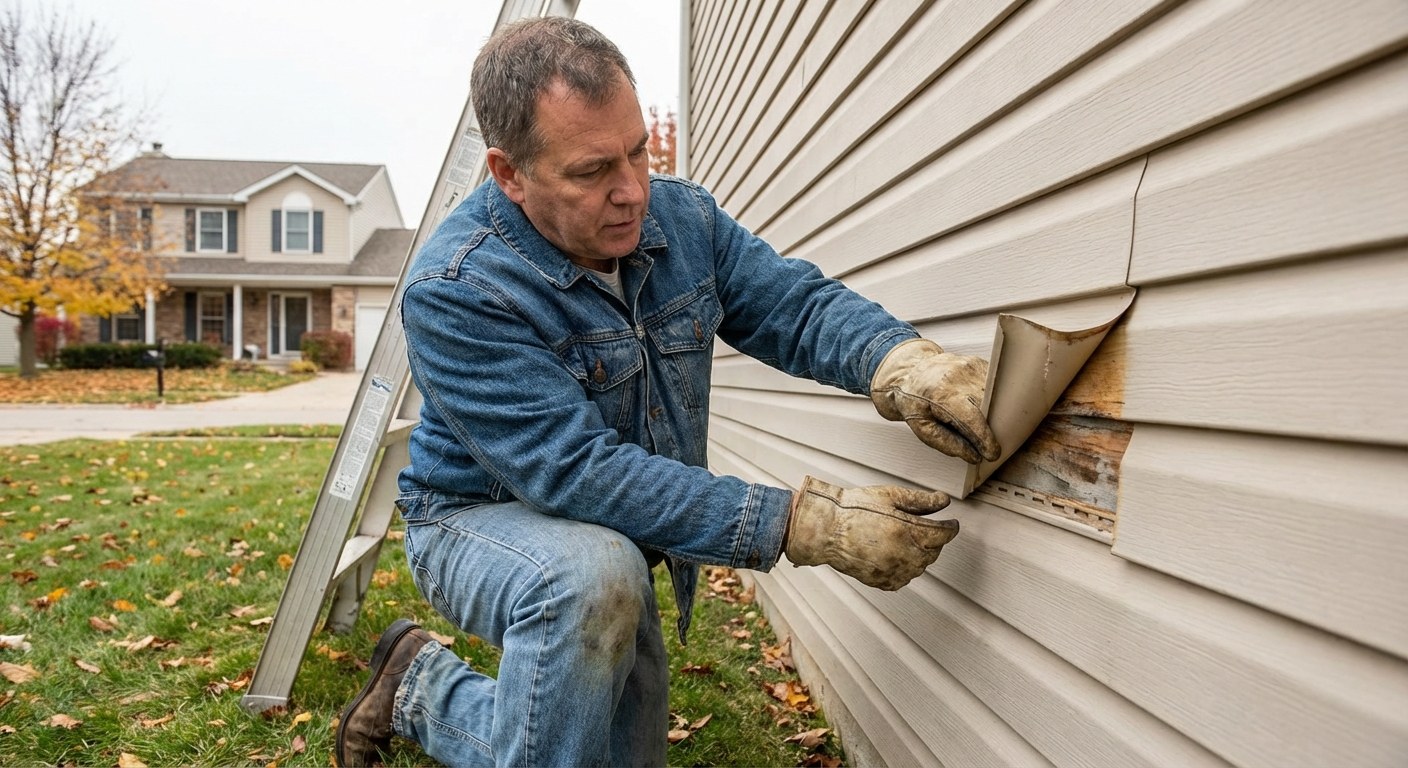
Peek behind the panel. This is crucial. Look for dark stains, mold, or "spongy" sheathing (the wood layer under the siding). If you see significant water damage or rot, stop immediately. You don't want to trap moisture inside; that requires a professional repair.
Identify the material:
Vinyl: Thin, plastic-feeling, usually has a "lip" that locks into the panel below it.
Aluminum: Similar to vinyl but metal; dents easily and sounds metallic when tapped.
Wood: Solid boards, clapboard, or shingles.
Fiber Cement: Heavy, rigid, cement-like boards (often looks like wood but feels like stone).
Once you've confirmed the wall behind the siding is healthy, you can proceed with the fix for your specific material.
How to Fix Loose Vinyl or Aluminum Siding
Difficulty: Easy
Time: 15-20 minutes
Vinyl and aluminum siding are designed to "float" slightly to handle temperature changes. They interlock with each other. If a panel is loose, it often means it unzipped from its lock or the nails popped.
You will need:
A "zip tool" (siding removal tool)—inexpensive and available at any hardware store.
Galvanized roofing nails.
Hammer.
The Steps:
Expose the nail hem. You can’t just hammer through the face of the panel. You need to get to the nailing strip hidden by the panel above the loose one. Slide your zip tool under the bottom edge of the panel above the loose one.
Unzip the seam. Wiggle the tool and slide it along the panel to unlock it. Pull the upper panel outward gently to reveal the nailing hem of your loose panel.
Drive the nails. Locate the empty nail slots. Drive a galvanized nail into the center of the slot.
Crucial Tip: Do not hammer the nail tight against the wall. Leave about 1/32 of an inch (the thickness of a dime) between the nail head and the siding. Vinyl needs to slide side-to-side as it expands and contracts.
Re-lock the panels. Push the upper panel back down. Use the zip tool again to pull the lip of the upper panel over the lock of the lower panel until it snaps back into place.
Check the movement. The panel should feel secure but not pinned tight. It should be able to slide slightly left and right.
How to Fix Loose Wood Siding
Difficulty: Moderate
Time: 20-30 minutes
Wood siding relies on a tight seal. Unlike vinyl, you want these boards firmly attached to the studs to prevent warping and water intrusion.
You will need:
Drill with a 1/8-inch bit.
Galvanized siding nails or stainless steel ring-shank nails.
Hammer.
Paintable latex exterior caulk.
The Steps:
Check for rot. Press a screwdriver gently into the wood. If it feels soft or crumbly, the board needs replacing, not just renailing.
Position the board. Push the board flush against the wall. Ensure it aligns perfectly with the neighboring boards.
Drill pilot holes. Wood can split easily, especially if it's older. Drill a small pilot hole through the siding and into the wall stud. Space these about every 16 inches along the loose section.
Drive the nails. Hammer the nails in until the head is flush with the wood surface. Do not sink them deep into the wood, as this creates a pocket for water.
Seal the heads. Dab a small amount of latex caulk over the nail heads. This prevents rust and keeps water from entering the wood through the nail hole.
How to Fix Loose Fiber Cement Siding
Difficulty: Hard
Time: 25-40 minutes
Fiber cement is heavy and brittle. It lasts a long time but can crack if handled roughly.
You will need:
N95 mask (silica dust is dangerous if you drill or cut this material).
Drill with a masonry or carbide bit.
Corrosion-resistant wood screws or siding nails.
Exterior caulk.
The Steps:
Inspect for cracks. If the board is cracked through, it usually needs to be replaced. If it's just loose, proceed carefully.
Position safely. Hold the panel flat against the wall.
Pre-drill. Drill a hole about 1 inch down from the top edge, aiming for a wall stud. You cannot drive a nail directly into fiber cement without pre-drilling; it will likely shatter.
Secure the panel. Drive your screw or nail until the head is flush. Do not over-tighten. If you drive it too deep, you will crack the board.
Caulk and seal. Cover the fastener head with color-matched caulk.
When to Call a Professional
While re-securing a single panel is a great DIY task, there are times when you should pause and call a pro.
Extensive Water Damage: If you see black mold or wet insulation behind the panel, you have a leak that nailing won't fix.
Widespread Movement: If entire sections of the wall are shifting, you may have structural issues.
Height: If the loose panel is on the second or third story and you don't have the right equipment, don't risk it.
Keeping track of these small exterior repairs is a great way to maintain your home's value. You can use the Casa app to log this repair, noting the date and the type of siding you have, so you have a record for future maintenance or insurance needs.
Time and Cost
DIY Cost: $10 - $30 (for nails, caulk, and a zip tool).
Professional Cost: $150 - $300 (usually a minimum service call fee).
Taking 30 minutes to secure a loose panel today can save you thousands in water damage repairs down the road. It’s a small task with a big payoff for your home’s health.
Ready to tackle more home maintenance with confidence? Download the Casa app today for personalized guides and expert support right in your pocket.